

by Novus
I'm headed to the Las Vegas Open in about 2 weeks. My first out of state tournament and I'm getting my army completely painted (finally) and ready for transport. One thing that I'm really trying to do is compact my army for the trip. But, the way a GW Heldrake is built, sort of a wide inverted-V with lots of easily broken fiddly bits, makes this difficult. My Helbug breaks down really nicely (wings and carapace fold/come off) and I want to duplicate that functionality. So, this is how I made my 2nd Heldrake (yes, I'm one step closer to being "that guy") take up less space in the army case.
You can find how I magnetized the weapons and head in Part 1 - Here.

There were two of these 3/8" Neodymium magnets laying around my hobby table and they were perfect for the job. Unfortunately, I needed at least two more. So, naturally, I bought 50 more with free Amazon shipping for about $14.00!
I had to rip the wings I had glued on back when I first got the model, off. Tough to do without causing some minimal damage, but it worked out. Nothing a little paint can't fix.
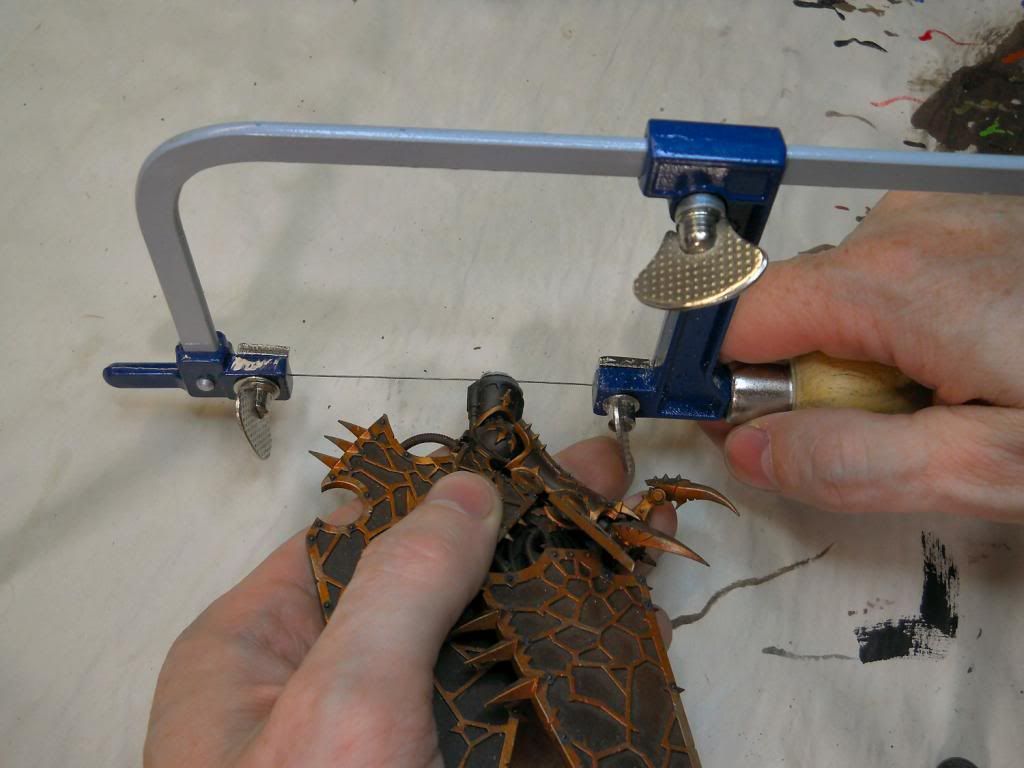
Then came the cutting. The ball and socket joints that GW is using for their models now I think is a direct attack on magnetizing. More surface area for glue means a stronger bond, harder to disassemble, and a rounded bonding area means it's harder to magnetize. In short, they want us to not be able to magnetize and swap parts easily to force us to buy more models. Makes sense from their POV, I suppose. But from my POV I feel that it is my duty to foil their plans!
I bought a hobby wire saw a few months ago at the local model train store and I have to say, it's a must have tool for the model converter. Very precise cuts. Love it!

Before mounting the magnet on the wing, I had to sand the amputated ball joint down flat.

Then, a drop of the ol' super glue and the magnet stuck real nice. Make sure to give lots of time for the glue to cure.

To mount the magnet on the body, I slathered the newly mounted wing magnet and arm with Vallejo liquid mask (light blue liquid, above) and let that dry. This was to prevent any of the green stuff from the next step from sticking to the wing assembly. Once the mask was dry, I placed the body magnet onto the wing magnet.

I then rolled up a WAG-sized ball of green stuff and stuck it in the socket on the body. There needs to be enough so that it squeezes out the sides of the mounting.

Lastly, I pushed the wing assembly (being careful that I put the left wing on the left side) with the body magnet down onto the ball of green stuff. This caused the ball to smoosh out from under the body magnet. I pushed that smooshed green stuff back up around the sides of the body magnet as best I could and then set the Drake up so that it could cure overnight.

When all is done, the wings snap on and off the body nicely. The neodymium magnets are strong and only add about 1/4" to the width of the Drake. Now, I have a nicely collapsible Heldrake that is ready for the long trip to Las Vegas!

Happy Bashing!
No comments:
Post a Comment