
 |
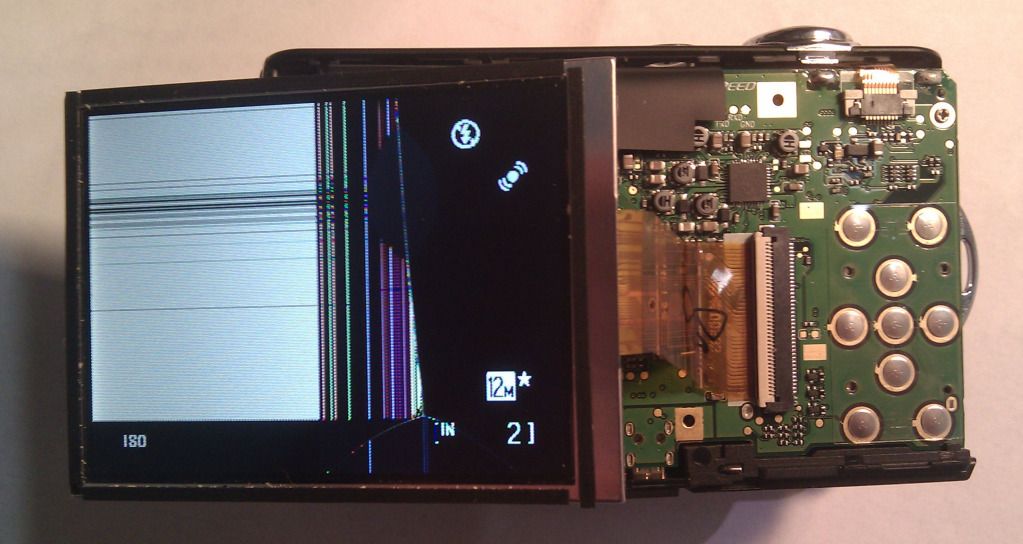
| Yep, that's broken. |
by Rich K.
Well, two weekends ago I trucked over to Frontline Gaming to catch a 1750 point game with my buddy, Tim. I brought my camera along with every intention of recording the event. While setting up the table and deploying I put my camera in my back pocket and probably leaned against something sharp which cracked the hell out of my screen, as you can see.
Turns out, if you google a string like "replacement screen Nikon Coolpix L22" you end up with a lot of options, mostly folks on eBay selling the replacement screens. For some reason, the only viable option was a Canadian guy selling the screens out of Chicago via eBay Canada and it only cost $17.99. The US sellers were all sourcing out of China and had more than 2 weeks of shipping required. So, I got my screen in 2 days rather than 14+... yay, Google/eBay!
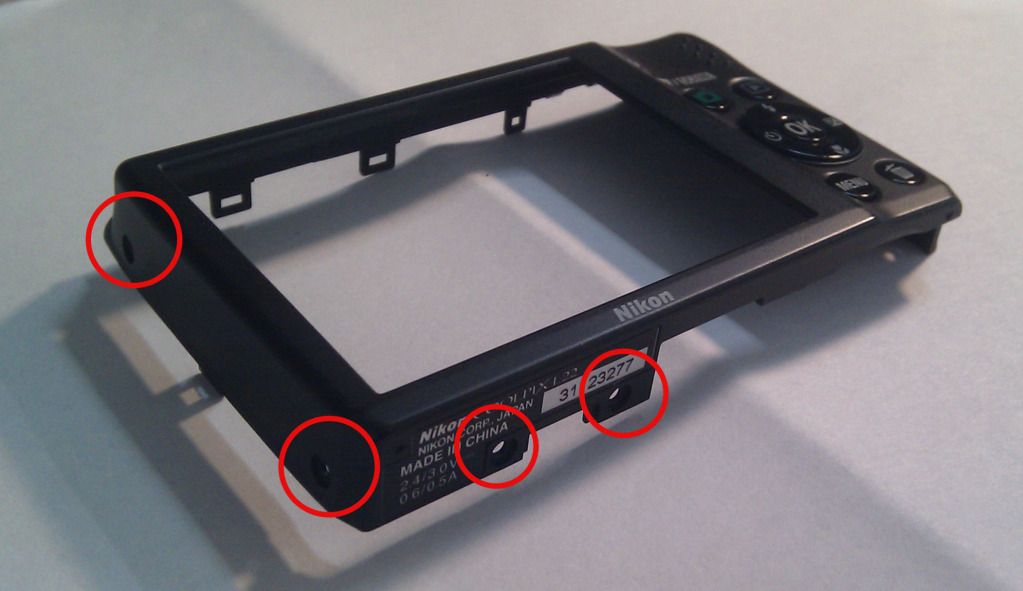
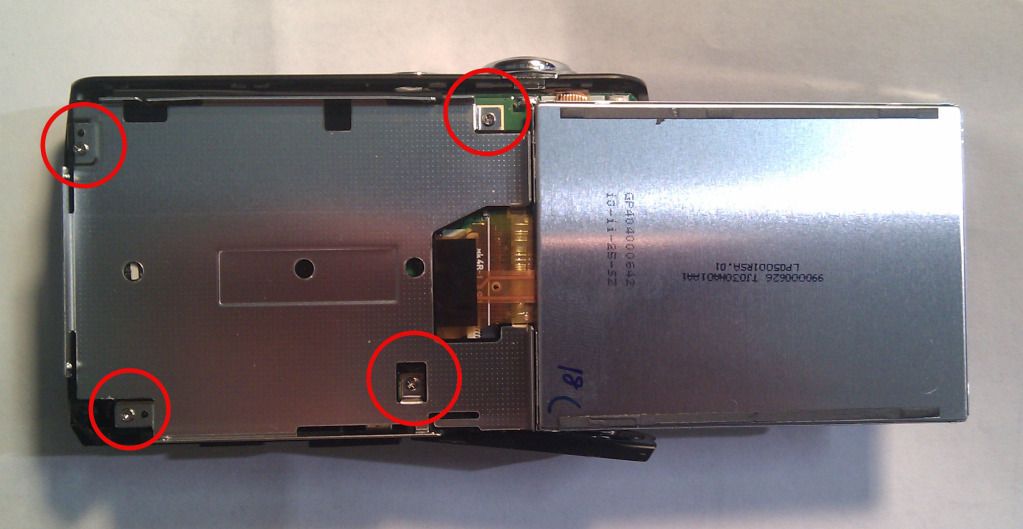
Once I got my screen, I had to fix the thing. The first step is to remove the batteries and all the screws from the casing. There are seven screws visible but I think only 6 need to be removed.
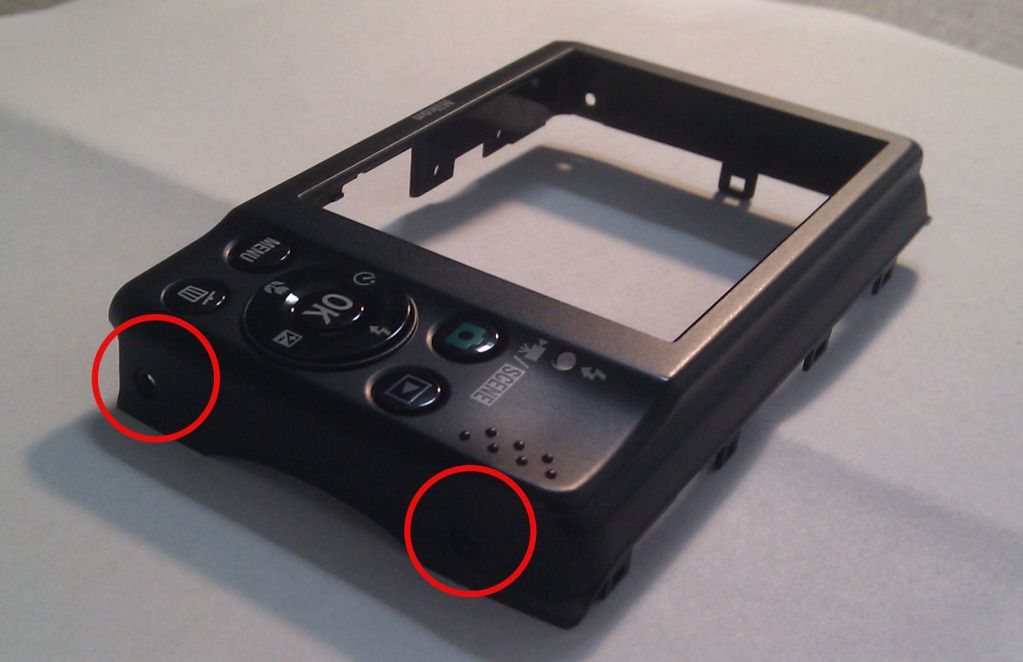
When these black screws are out just gently work a tool (or your fingernail) in between the halves and pry them apart. An iPod separator tool would be good for this too.
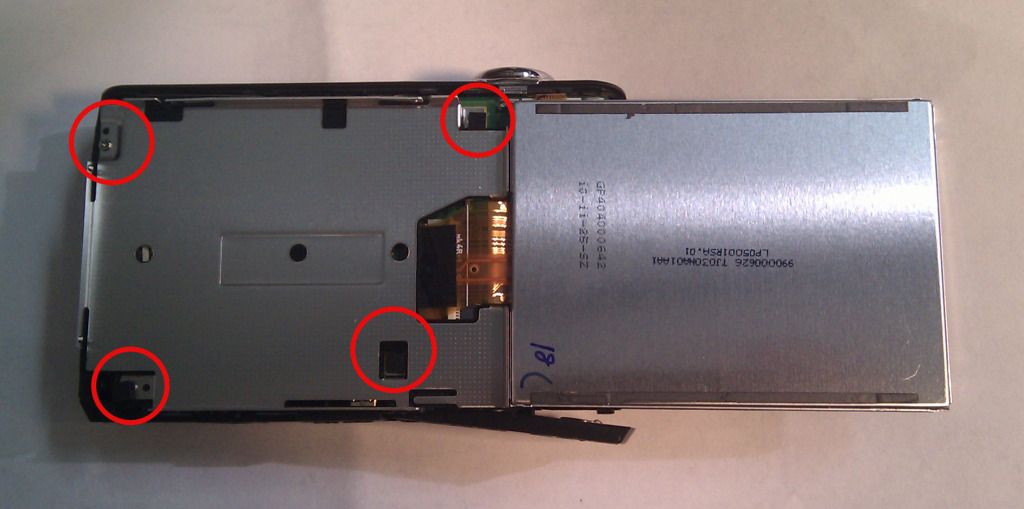
Now that the insides can be seen, flip the screen over to the right. To remove the metal bracket that holds the screen 4 silver screws must be taken out. 3 of these screws are covered by a black foam square that needs to be removed. Be sure to place all of these parts in a safe place for when you have to put it all back together again.

Now, the screen itself must be removed. The screen is attached to the circuit board via a clear orange-ish ribbon cable. The long black-and-white component below is the connection point.
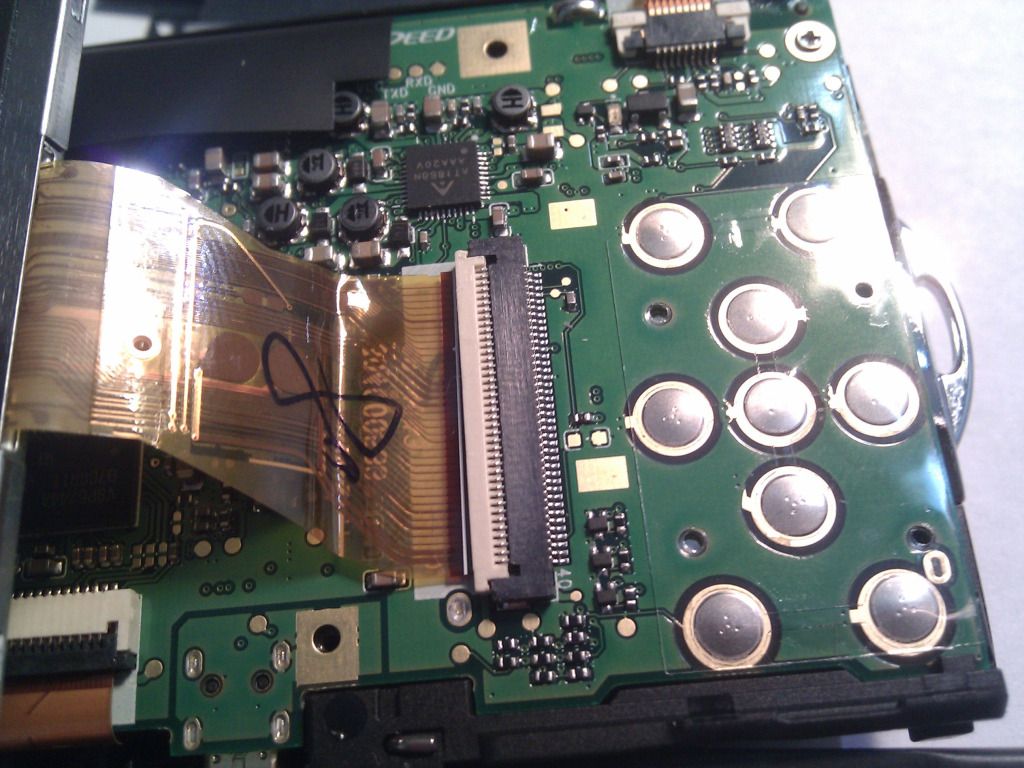
To disconnect the ribbon cable, just flip the white part of the connector up from the ribbon side. This unlocks the ribbon and allows you to slide it out gently. Take note of how the ribbon connects and where the bends are. You may have to pre-bend the cable before replacing the screen.
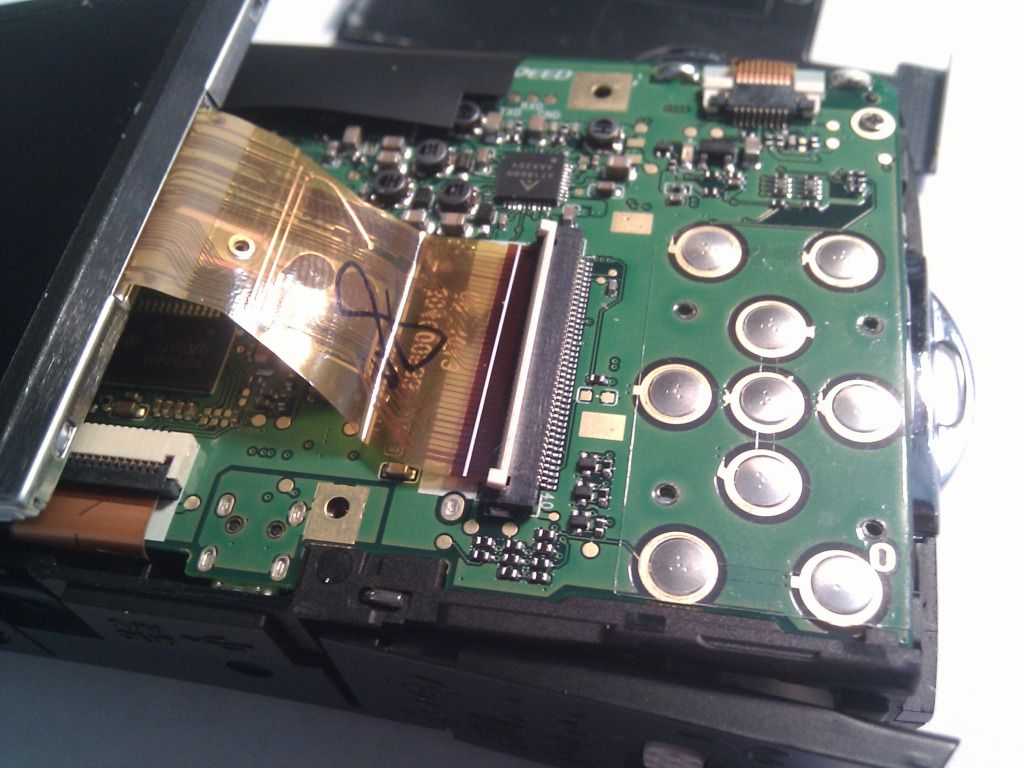
Finally, slide the ribbon for the new screen into the connector and lock it down.
At this point it's a good idea to put the batteries in temporarily and to check and see if everything is working correctly before you put it all back together. Be careful to keep the metal parts from touching and shorting/destroying the camera during the test!

The brackets from the startup screen mean it's working! Now, just reverse the steps above to put it all back together.
Macro Photography with the L22
I finally figured out why my macro shots weren't coming out as well as they could. Not only do you need "macro" mode on...

...but you also need "close-up" mode on, as well.
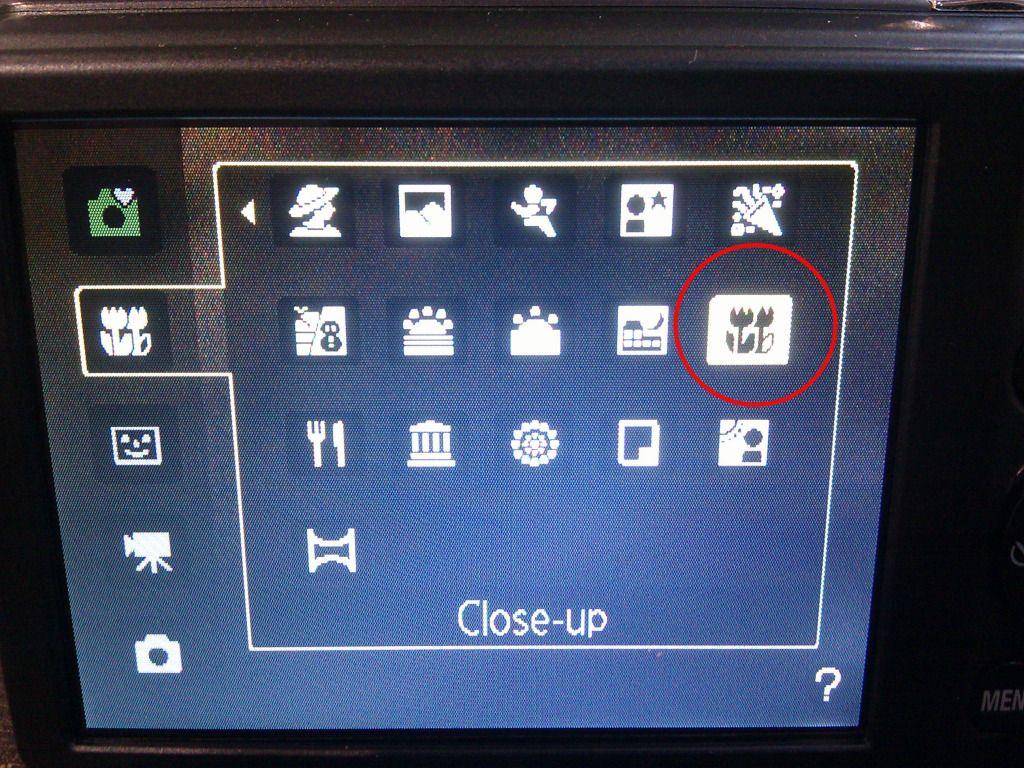
For some reason, Nikon made both of these icons very similar so it's easy to confuse the modes.
With both modes active I took a couple quick pictures of some models.

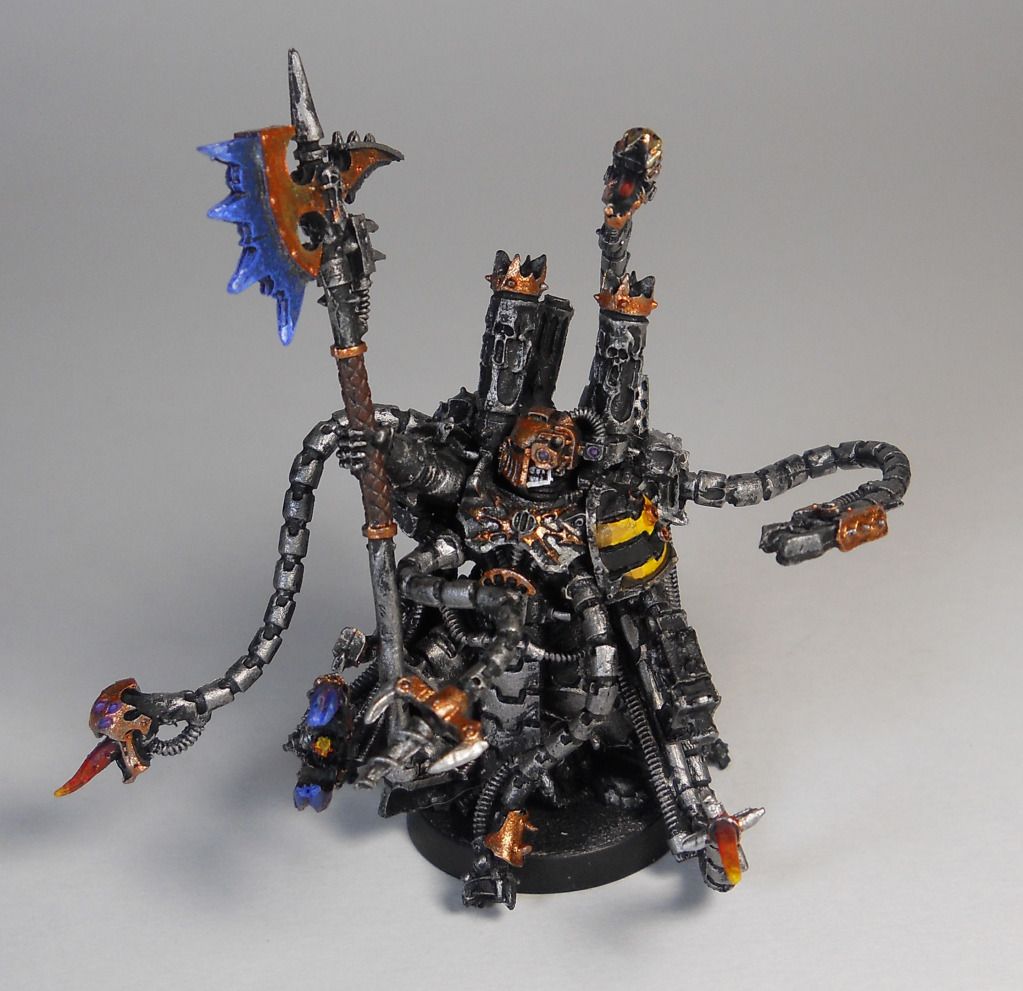
The shots above are only cropped. There is no other processing involved.
Aside from the overly fragile screen, I still really like my L22. It takes great shots inside and out and has a respectable macro-mode for only about $120.00.
Isn't technology grand?
ReplyDeleteYeah, it's surprisingly easy to fix. I think they actaully engineered it this way 'cause they know how fragile these screens are. Relatively cheap replacement, too.
ReplyDelete