
by Rich K.
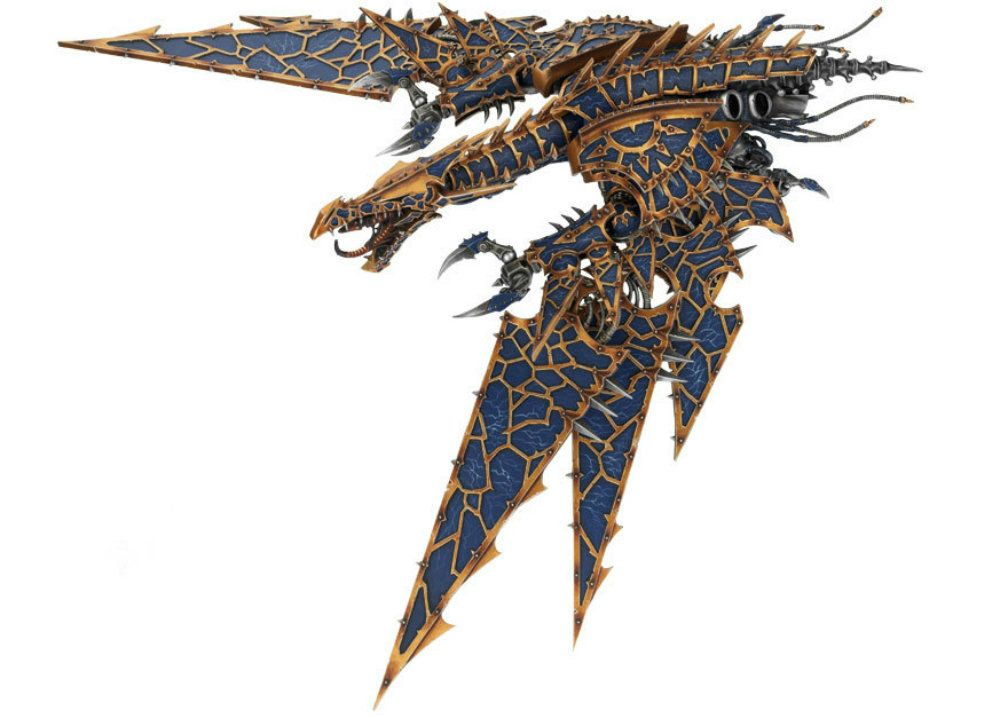
The Heldrake is by far the most fiddly GW model I’ve encountered. The wings are probably a dozen pieces each and all of that weight connects at the shoulder! It’s a great looking model, but… man it’s a PITA to build. So is the Warpsmith, by the way.
Also, the one option you get to swap out is actually part of the structure that holds the head together. My recent enthusiasm for magnets on models (and keeping my options open) compelled me to find a solution to this problem.

These are the raw parts. The twist-ties are for holding the parts together as the glue dries.
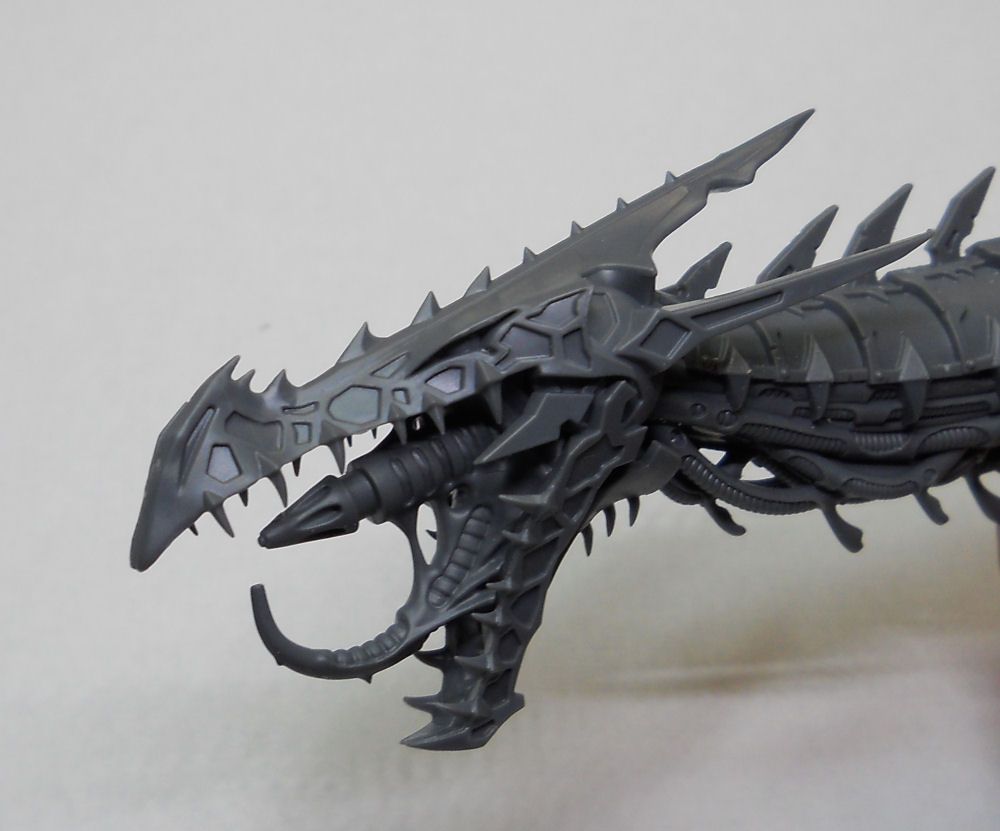
Twist-ties and cable-ties are great for holding round pieces together during the curing process. You can also use them to hold other non-round parts on, like I did with the Heldrake wing assemblies. They are also excellent for holding parts together when you have to drill along a seam, like with the neck assembly on the Heldrake. If you don't support the seam the drill will just rip it open.

Drill your holes next. I use 1/8" magnets, which are kinda large for this application, but with some careful drilling they fit in place pretty well. Drill one hole under the tongue on each half of the head, one hole in the back of each optional mouth weapon, and one hole at the end of the neck.
The mouth weapon is what mounts the head onto the neck so it's very important that you use strong magnets or its head will continually fall off. The head pieces go around the weapon and the weapon sticks to the neck.

You can see above that the neck has two holes in it. The hole on the very end makes the head look up, sort of. This looked a little odd so I placed a second magnet that lends a more looking-down-at-the-ground feel.
When the head is put together it looks like this...

You may end up with a bit of a seam where the parts join, but with a bit of filing and careful cutting you can have the head look pretty close to seamless, even with only being held together by magnets.

The first hole looks like he's targeting a unit that is on his level or slightly above. It may look good against fliers.
The second hole works better for putting the flame to troops on the ground!

Wow, that's a fantastic idea! If I had a Hell Drake, I would absolutely steal this from you!
ReplyDeleteKrisken, it's a fun model but not easy to put together. Steal away!
DeletePerfect, I was wondering what this process would involve. Just a few more weeks and I'll have the spare cash for one of these bad boys. I too was surprised that the wings were so fragmented, based on Faeit's video of the unboxing. I wonder how well someone could deconstruct the thing to make it back into some kind of jet. Probably more work than its worth.
ReplyDeleteYeah, this thing has probably 75% of the parts in the wings. The body and the stuff that sticks to the body (neck, head, armor plates, etc.) is only like 10 pieces. The wings are super-involved and hard to glue on just because they are soooo big and complex.
DeleteSounds like the chaos flyer is aptly named!!! Love the twist tie trick
ReplyDeleteEllis, I need all the help I can get when putting these models together. BTW, small cable ties are great for gluing barrels together, like on a Land Raider sponson or other tank with a long barrel that comes in two halves. They can take a lot of force and won't mar the surface. It also forces the halves to self align... REALLY handy trick.
DeleteReally nice tutorial |! :)
ReplyDeleteCheck out my blog !
If You'll like it, follow it just like I follow Yours :)
Greetings