
by Michiel (aka b'Raass)
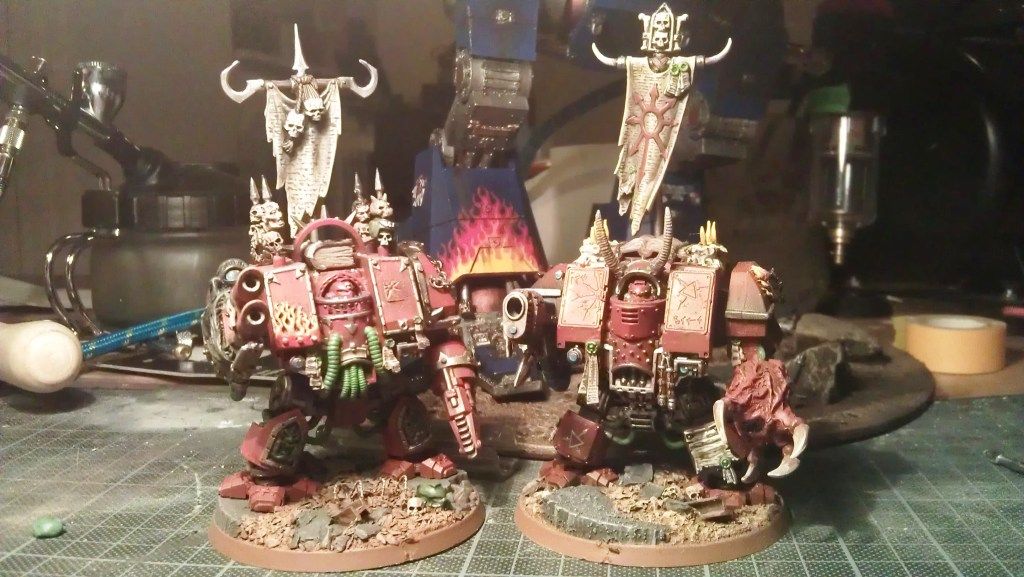
Waaaaaaaaay back in July of 2012 I ordered some Tentacle Makers from Rich, and when they arrived I emailed him to confirm reception. We started some back and forth emailing and eventually this led me to send some pics of my WIP projects – which triggered my first guest post on Bucephalus, my true scale Khorne champion. I also sent Rich some pics of my first Green Stuffed Chaos Dreadnought, shown below. Rich liked the flames on the dread so much he asked me for a guest post on them – which I promised and then never got around to…
Now Rich is not only a guy with great ideas and the perseverance to make them into a running business, he’s also a very kind interwebs friend who keeps in touch. So here’s my loooooooong overdue guest post on how to make Green Stuff flames!
Step One:
Roll a ball of green stuff and press it into a flat surface, the top of which has a vertical arch. Like so:

Step Two:
Cut V-shaped straight lines into the pressed GS with an Xacto-knife (or whatever other kind of sharp cutting tool you have laying around). Ninja’s must use katanas! After making these cuts, peel away the inside of the V’s, like so:
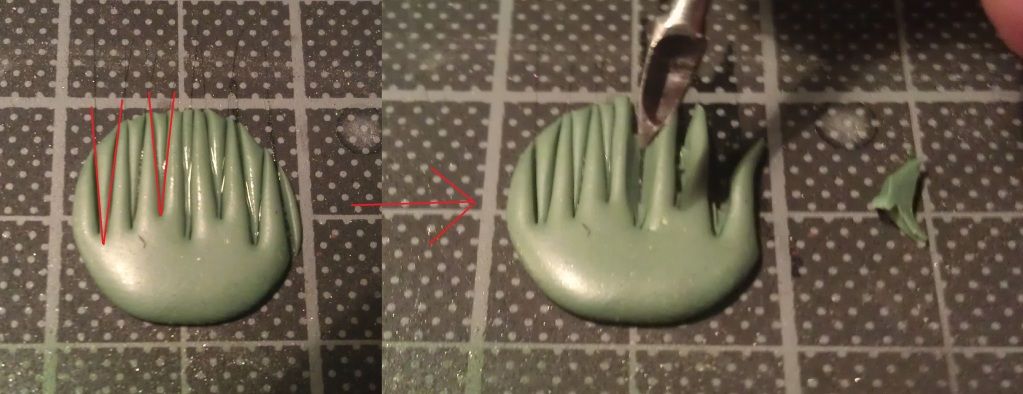
Remember, people: always keep your tools wet when using GS. Spit will do, but seeing as GS has no vitamins, water is probably better.
Step Three:
Use the sculpting tool to smooth the “spikes” into a sharper shape. These will eventually be the flames. I use a sculpting tool with a round backside for best results.

Step Four:
Now use the same tool to indent the flames tendrils from the sides. Begin with the lower part of the flames and then work up, alternating between right and left when doing the same flame. Also alternate between starting with the right side or the left side of the bottom between each flames. And hey presto, after doing all of the flames, you have a small 3D-ish inferno! (Please don’t run my fingerprints through the system. This is GSI, not CSI)

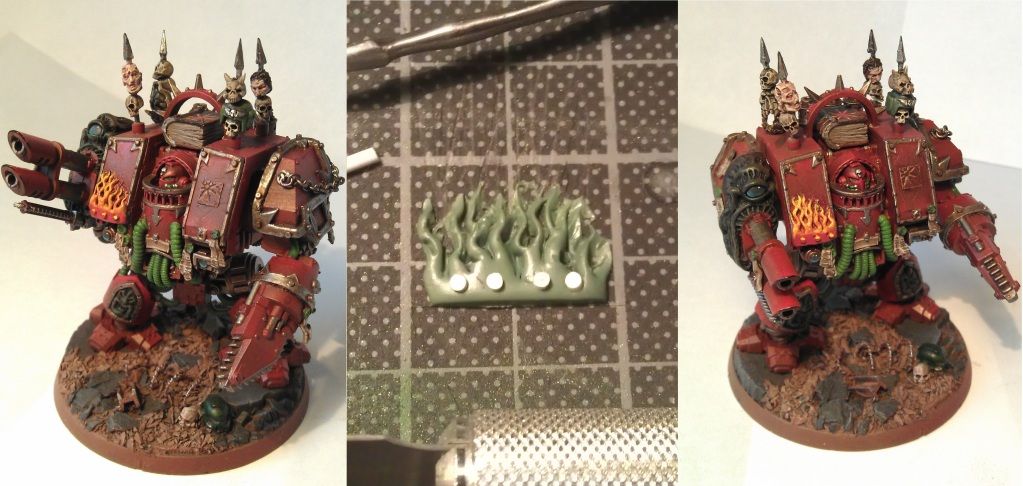
Step Five:
Press something flat on the lower end of the flame-sculpture. This give it a more regular surface. I usually cut off the lower edge and put some plastic rivets on it for good measure – but that’s optional. See the result below (middle) and how this technique was used on my finished and painted dreadnought (left and right)! The cabling on the front was made using the VEX-040 Tentacle Maker by GSI.
That’s it! I hope you guys enjoyed the little tutorial. It takes some practice to get right – but practice makes perfect and you learn the most from mistakes so have a go at it.
***
My Commision Work
If you like my work and have something you need done, why don’t you drop me an email at...
braassprojects(at)gmail(dot)com
...and we can see if we can work something out? Mind you though - I am based in the Netherlands.
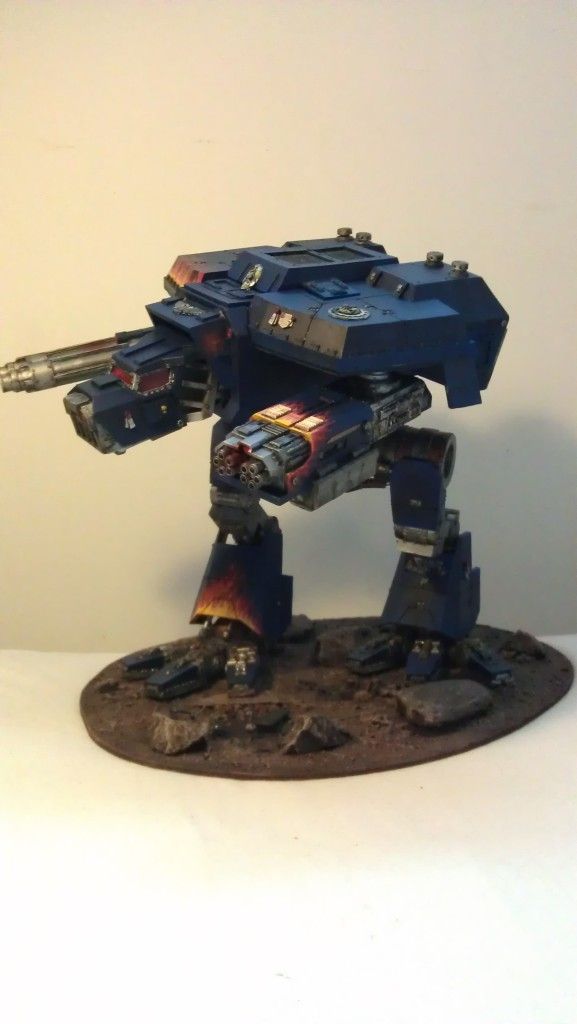
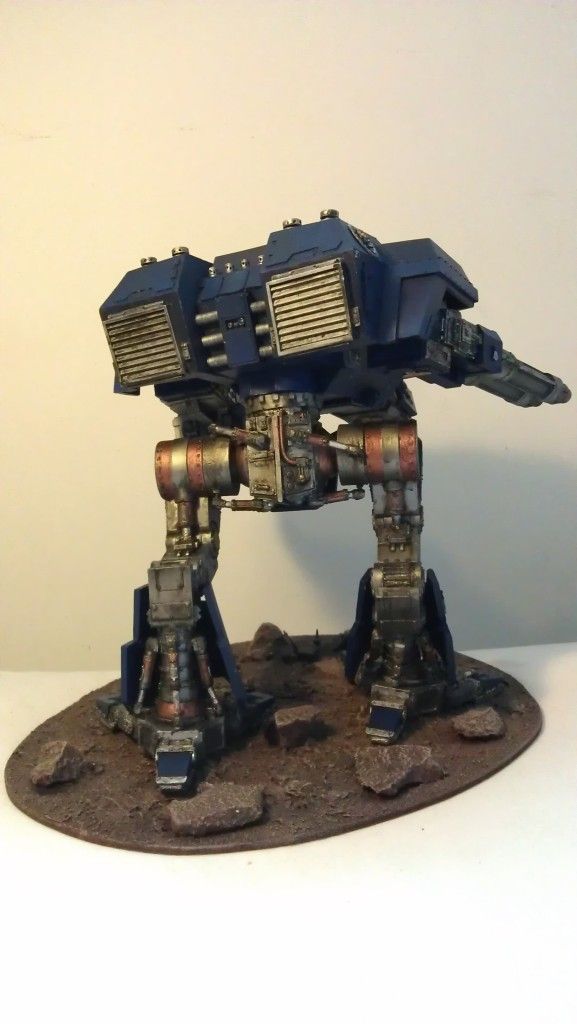
An example of my latest commision, a repair and repaint, is pictured below.
 |
| This is how I received it. |
 |
| This is how I sent it back. |


Very nice tutorial! On the CSI front I believe Horatio Cain would say something like: Looks like we caught him... green handed (put on shades here). Waaaaaaaaaaaaaaaaaaaaaah!
ReplyDeleteI can almost hear The Who in the back ground.
Deletelolz!
ReplyDelete