

by Novus
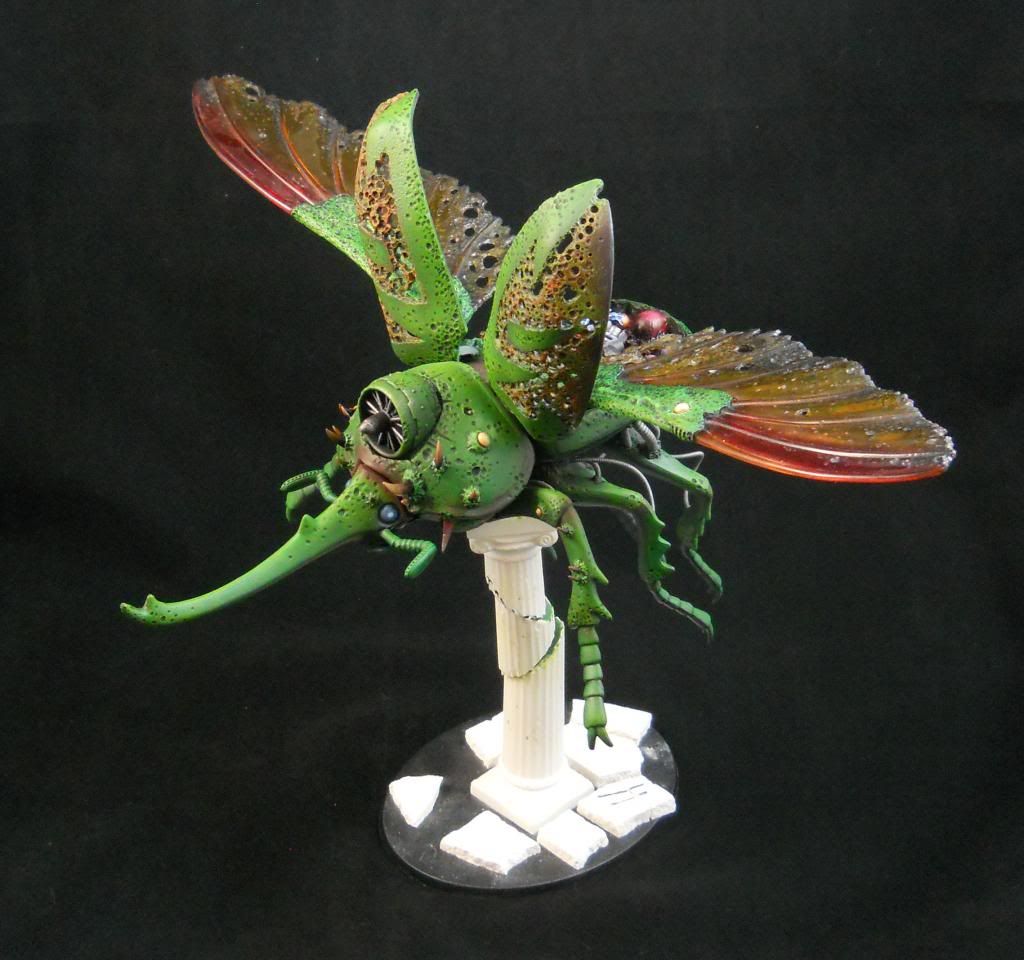
The Helbug is completed! Well, mostly complete. In taking these photos there're a few things I think I now need to fix. But, they are small things and for all intents and purposes, this bugger is done!
The base, on the other hand, is not done. I'll work on that between other projects, though. My idea for this base is to attach a Space Marine Speeder between the four rear legs as if it is being smashed into the pillar. Like the Helbug grabbed it out of the air and ran it into the column during a vector strike. The only problem I see with that idea is that I really don't know how I'll sculpt flames and smoke that large.
I also envision this thing not being super agile. It would clumsily bumble-bee about the battlefield, bouncing off of friend and foe alike, causing all sorts of wonderful chaos.

The first time I thought I was done with this thing it just didn't feel done. The back cavity looked pretty empty. This weekend I had a brainwave and I added the warp-energy Tesla coil. The Object Sourced Lighting (OSL) looks horrible in these photos for some reason. It's far smoother and less in-your-face in person.


The warp-energy coils are the ball section of two Robogear ball joints. I then sculpted the energy arc across the gap between the copper spheres.

I did my best to make the OSL have a stark contrast between the energy arc-light (I think of it like a flash bulb) and the shadow that is cast. It came out pretty good. But again, it looks better in person.

The obligatory Tentacle Maker work.

There is a lot of Dremel work on the wing covers and both the top and bottom of each wing... seriously, a lot of Dremel work.

That poison bladder in the back I did using my Elephant Skin technique. I've never seen it before, so I'm taking credit for it, damn it!

I tried to tie the whole model together, tip to tail, by giving all four eyes (there are also two underneath on either side of the mouth parts) a warp-energy glow similar to the arc in the back. The light blue also makes the eyes pop really nicely against the green/brown of the carapace.

In doing this project I've come to appreciate gloss coat. It's great for guts and horns as well as making those giant pustules shine. It makes all those features look either wet (the guts) or smooth (the horns and pustules). The contrast between dull and gloss can really make features like these stand out.
This thing was so fun to put together I ordered the scorpion version of the kit. I think I'll either turn that into a Plague Hulk or a Giant Chaos Spawn. BTW, if anyone sees an inexpensive kit of a house fly, let me know!
These are the other related posts in case you want to see the evolution of this monster...
For my local blog followers, remember that GSI is hosting a Bitz Swap event at Frontline Gaming this coming Saturday from 5-7pm.
On to the next project! Two Relic Predators!
Happy Bashing!

That is just sooooo cool!
ReplyDeleteThanks, Zab! I'm pretty happy with it.
DeleteFantastic! Love how this is turning out and can't wait to see it finished with the base.
ReplyDeleteI'm also currently doing some converting to make a Heldrake model, but nothing this intense! Beautiful work!
Krisken
Oddly, the painting didn't take that long. What was the big time sink was, as I said above, the Dremel work. And thanks, Krisken!
Deleteabsolutely awesome!
ReplyDeleteThanks, Butcher!
DeleteAwesome!
ReplyDeleteThanks, Reece! I brought it on on Saturday but you had left by then. And thanks for plugging the Bitz Event!
DeleteFreaky deaky! Love it!
ReplyDeleteHigh praise indeed, Jugger! I thank you!
Delete