
 |
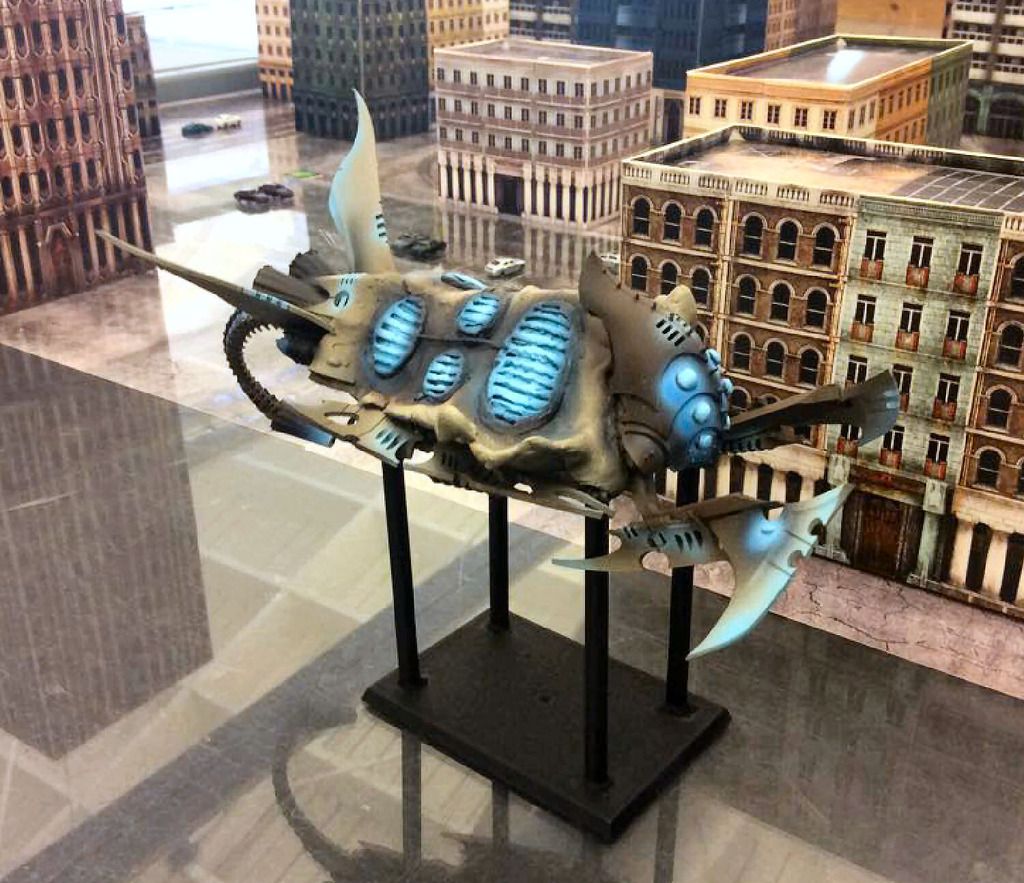
| The Scourge Leviathan! |
Last week I attended the EndGame Dropzone Commander Campaign, LEVIATHAN! As its economy is based on Intel, I had high hopes of being able to put some of the theories I put forward on collecting Intel and Objectives in DzC to the test (see Emulating Shaltari Shenanigans... Sort Of). Luckily, both missions I was part of focused on collecting I/O. Although the first was a rural map, I was able to adapt somewhat successfully.
(Please note this is all from my substandard memory, so if I get something wrong please forgive me)
Game The First

I won't spend too much time on this one as there is not much I can specifically relate to my first Shaltnanigans post due to the rural nature of the map. The 7 Objectives were placed in mostly area terrain (forests and boulder fields) with the central Comms dish (#4) counting as a small building. There were three across the center line and two each back near our respective table edges. The Objectives in the yellow circles were campaign Intel.
I played Mike and his Scourge and it was a great game punctuated by one failed (and very statistically unlikely) To The Deck roll by Mike, some expert rolling against my Erebos (Need a 6 to hit? You got it!... Again.) also by Mike, my Athena doing 4DP to his Lightning Squid in one run, and a nail biting escape with an Objective by my nearly useless surviving Menchit.
I think I made two major tactical mistakes in this game:
- I didn't realize that Scourge Invaders can boost an extra 3", so Mike got two objectives off the table a turn faster than I expected, giving him 4 points. I could have tried to hit at least one with a Nemesis laser before they left but I went after a different target, which likely cost me the win.
- I brought Menchits. These are the single most useless units PHR have, even with the points drop. So far, I've found no way to bring them to bear before they get destroyed. They are much too niche in their use. It's easier just dropping the buildings than flaming the troops inside.

My plan here, based on the collection theories was to jump out and grab as many objectives as quickly as possible using any unit I could. A-B-C... ALLWAYS BE COLLECTING!
My main problem here was that Scourge are so much faster that I felt it was important to get the Objectives FIRST or I was never going to get them at all. So, I rushed forward willy-nilly. Which worked out pretty good, actually.
Being a rural map, the walkers could enter the forests and grab Objectives easily and I used this to my advantage as it effectively tripled the number of collecting units I had available. Plus, snatching them early can put a fair amount of pressure on your opponent.

Erebos in a forest are just murder to try and hit (minimum of +1 jamming, +2 soft cover, and later I played an Adaptive Camo card on them, too!). Those two little guys held off probably a third of Mikes army for 2 turns-ish. Mike did end up killing them, but it took a LOT of shooting. I was able to grab the Objective here but had a Hell of a time getting it out. Mike did eventually wrest it from my grip via some Prowlers.

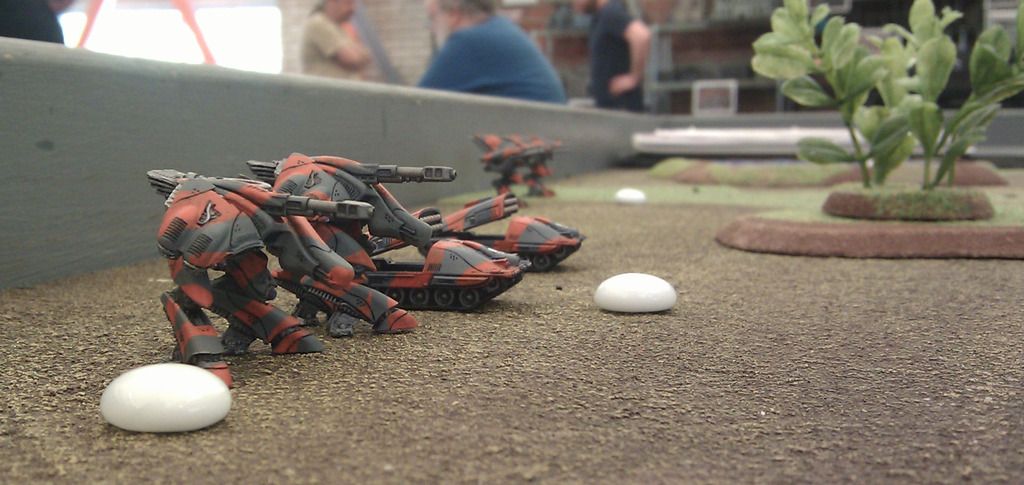
Note the grab-n-go tactics of the vastly outnumbered Menchits below...

The game was a tie in Objective points, 5 all, but Mike killed maybe 110 more points of me than I did him, which gave him the well earned win. I did collect more Objectives than he did (4 to 3) and did manage to get one off the board (via the surviving Menchit, actually) compared to the two he removed.
Overall, I think the unfamiliarity of playing on a rural map shifted our focus from tactics to figuring out how to play on a rural map. Because of this lack of expertise we only got 5 turns finished and were well into lunch by then. Had we gone to 6 it may have turned out differently for me as I had 3 objectives less than 10" from my board edge and Mike had only one left to remove and it was in my half of the map. I just plain ran out of time to pull off a win.
The rural game experience was really fun and freshened up the tactics, but MAN(!) was it strange. I highly recommend it!
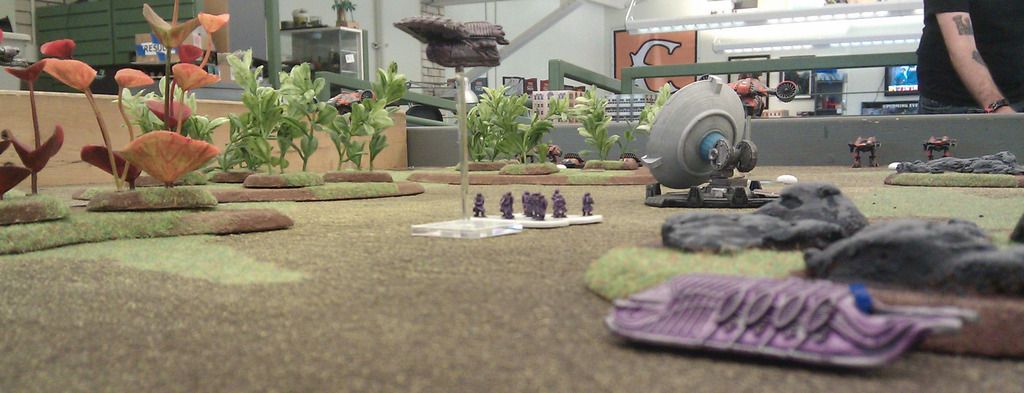
Here's some additional photos of the event as taken by Mike Montesa and Stephen Bajza...


Game The Second

This second game was against Soloman (of SCOLDZAP fame, go check it out!) and his Bad Motor Falcons list (I think there were 9 Falcons in it!). I'm going to concentrate on discussing the collection of Intel here, rather than how the overall game went. Suffice it to say that Solomon had far more firepower than I did and by the end of the game, it showed.
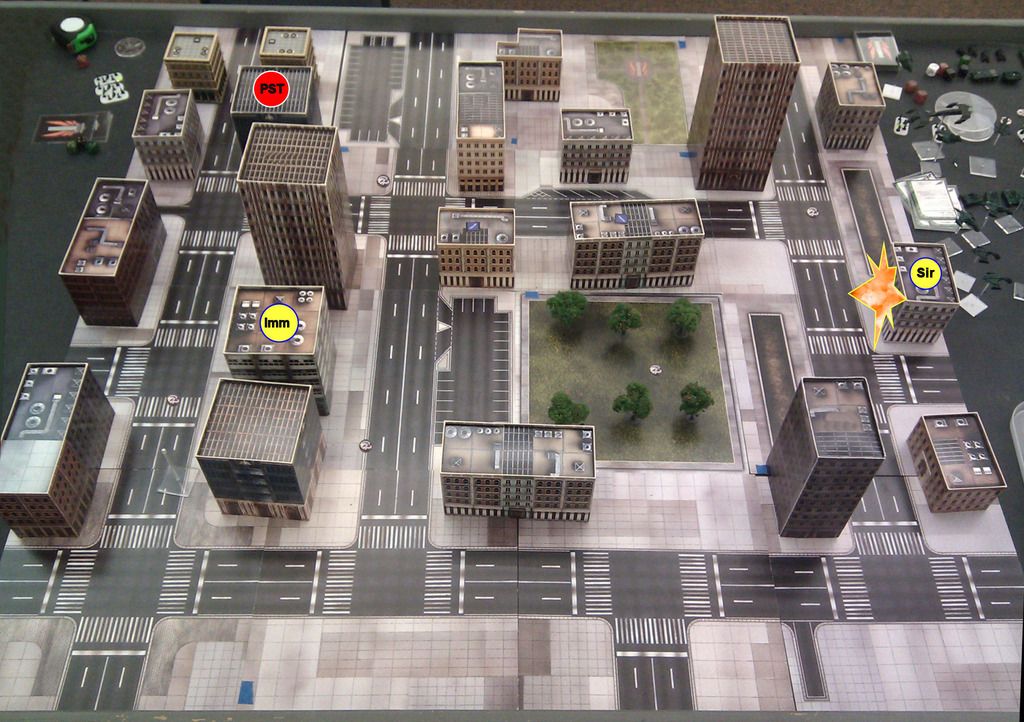
The Intel was laid out thusly...

My board edge is at the bottom of the photo and Solomon's is at the top.
Not having to concentrate on the intricacies of a rural mission finally allowed me to test the collection scheme as it was originally intended. Assessing the map and where the Intel was before the game started helped me decide to...
- Concentrate most of my collecting on my West/left flank as there were 3 Intel markers clustered on that side in my half of the map. I used one squad of Immortals in a Juno carried by a Neptune for this.
- Have the second set of Immortals from that Neptune act as bait for his Scimitars by leaving their Juno exposed early in Turn 1. This would allow me to move my Nemesis forward on the right/East without worrying about devastating Scimitar fire in addition to all the Falcons. It was a choice fire lane I placed the Juno in so I figured odds were good Solomon would enter the board opposite my Juno. The Immortals would collect only one Intel the entire game, but I liked the idea of getting his Scimitars placed far from my Nemesis by losing just one Juno. And I always pull that dumb Call For Extraction card... maybe this time it will be useful.
- The Sirens would concentrate on collecting on the right flank. They have a potential for two (or if I got very lucky, more!) collections on that side. They would jump out and grab that first one and then hold in the large building until I felt it was safe to snatch the second from the small building. All of the buildings in the center and on the right/East were probably more than 11", door to door so I had to be careful with the Sirens and my measurement of their hops.
- The small and medium buildings North of the park were toast. I was pretty confident I could bring them down quickly and deny Solomon 2 Intel. I could maybe even drop them with troops inside. Either way, fiery collapse was their fate!
Here's how the collections went...
Photo Key
Imm = Immortals/Juno
Sir = Sirens/Triton
PST = Preatorian Sniper Team/Raven
Pre = Preatorian Squad/Raven
Star = Objective
Explosions = Either/both of us shooting at buildings or destroying units.
Dashed Arrows = Drop ships
Solid Arrows = APCs
Turn 1

We both just lunged forward. I split my Neptune/Juno units on the left and tucked my Sirens into the tall building on the right. He killed the bait Juno with his Scimitars (yellow/blue explosion) near the middle. The other Juno I hid in the narrow alley between the medium Western buildings, South of its Immortal squad. I also shot at a couple of the buildings he entered but had no real effect on his troops.
Solomon failed a To The Deck roll (just like Mike last game, red/white explosion) and ended up dumping the surviving bases at the door of the building North of the park (later we realized this was incorrect as he should have dumped them at the board edge where he failed the TtD roll). His other units piled into their respective buildings.
Turn 2

My central Immortal squad found an objective! So, with their Juno gone and taking fire/falling masonry from Solomon's army, they bolted for the board edge. My Western Immortals found a bomb and lost 2 brave soldiers. They then crossed the 2" gap between the buildings to enter their second of the game, the tallest building on the West side of the map. I started firing on the medium building North of the park with my Nemesis to bring them down ASAP.
I ended up finishing off the surviving Praetorians from the crash with my Taranis squad. I also used a Countermeasures Hack card coupled with my Helios to severely overkill his other Praetorians in their exposed drop ship as they made a dash for the tall building on the West half of the board.
Solomon found an Objective in the Eastern tall building and 2 Intel via his other squads.
At this point we are even, for the most part. We each have 2 squads left that have enough mobility to search but Solomon has collected one more bit of Intel than I, he leads 3 to 2 and we have each found 1 Objective.
Turn 3

Having found another bit of Intel my West-most squad of Immortals cross back to the building they just left. I did this because I had an Underground Monorail card and wanted the railway to end under the building next to my hidden Juno rather than a building away, just in case I had to bug out or something.

My central Immortals tossed the Objective to the closest Phobos (above) and then later in the turn the Phobos tossed to the Taranis. The Sirens stayed put because I knew those Snipers to the North would have to leave the building to take that Objective off the board. I've had many Tritons sniped out of the air by Sniper squads... I hate those guys! The Sirens merely needed to be patient and then scoot forward and grab the Intel on the East edge of the board when the time was right.
I continued to pound those two buildings to the North of the park with my Athena, Nemesis, and Taranis. They were each below half DP at this point.
Solomon, I think because he didn't want to drop his sniper bubbles, left both of his Sniper teams on the walls. This kept his AA capability very strong and my Sirens at bay.
Turn 4

I played my Monorail card and scooted my West Immortals under the street, avoiding his Snipers to the North entirely. My central Immortal squad continues to hoof it South. The Sirens remain patient.
I mostly stop shooting those buildings in favor of attempting to defend myself from Solomon's armored and aerial onslaught. But, at this point those buildings are each at about 20% of their original strength. They are now deadly traps for searching troops.
Solomon did finally break his East Sniper Team out and fly them off the board with their Objective. His other Snipers held their position.
The score at this point is 4 to 4.
Turn 5

The West Immortal squad finds its last bit of Intel and Monorails it back to their starting building in case they need to hop in their hidden Juno and light out of there. My Taranis pass the Objective back to the central Immortals and they leave the board. The Sirens' patience has paid off and they fly over to that East building unmolested.
Solomon's final Sniper team continues to hold its position as their transport is headed East. He begins to wheel the rest of his army around in a concerted effort to kill my Sirens (and anything else in reach) before the game ends.
Turn 6
My Sirens find their final bit of Intel and weather a hurricane of fire into their building. But, the building still stands!
Solomon attempts to kill my Commander (Those spiteful UCM!) but I walk him off the board (which I come to find out is illegal unless he is carrying an objective). So, my commander should have probably died that game.
Final score: PHR wins, 6 to 4
Game Wrap Up
Solomon's army is a murderous flock of Falcons and likely not the best suited list for this mission. Keep in mind that he killed probably 90% of my army and I only killed maybe 25% of his. That much firepower is hard to beat any way you slice it. Drop his list into a Kill Point mission and he'll clean up.
Being able to try some of the collection ideas I posted in my last DzC post was awesome! It's a different way of thinking about this type of mission for me. But, having tried that thinking out, I think there is merit.

You can see in the animation above that my West Immortals were ABC'ing through that cluster of buildings, my central Immortals used my backfield Phobos/Taranis as a more durable Objective collection point until they could get off the board with it, and my Sirens were patient and waited for the right time, avoiding being engaged by the Snipers to the North. And, my Taranis and Nemesis played the old Intel-denial-game against those buildings North of the park.
A month ago I would have rushed the central buildings and engaged as soon as possible and likely lost everything very quickly. Especially since I was very outgunned.
One last look at the Leviathan...

Refining The Collection Theories
I used to really wonder why folks would take Junos/Neptunes... "too many points! Just take a Triton!" But now I realize that having those extra few inches to deploy into a building can be critical. Plus, Tritons get shot down sooooo easily (Frakking Snipers!!!). The added durability and flexibility of a larger drop ship and its ground transports is hard for me to argue against now.
Intel denial by damaging buildings is also something I missed in the last post. Concentrating on where your enemy will be, rather than where he is, is pretty important. If he's already got the Intel from the buildings he's in, why shoot those buildings? If he's smart, he should be long gone, along with any Objectives, by the time that building is significantly damaged. Plan ahead and shoot the buildings he will be in late-game and set the trap for his troops.
For example, those two buildings to the North of the park were absolute deathtraps by Turn 3. I didn't even have to bring them down all the way because getting a building below 10DP anywhere near my army makes them very risky places to go. By the end of the game Solomon did end up destroying the medium building South of the park and I destroyed the small building North of the park. But, the difference was that when I dropped the building, the Intel disappeared. Kill the Intel and you kill the other guys chances to win.

Lastly, try to apply your Command Cards to the mission. Countermeasures Hack allowed me to kill a Raven full of troops with a Helios squad from 20" away as opposed to one of his much closer Falcons (Photo above. Notice there isn't a Raven in that photo anymore?), further hobbling Solomon's collecting efforts and keeping those troops from attacking my West Immortals later in the game. I did lose one Helios to his Scimitars there, but I think the trade was more than fair. Also, the Monorail card effectively kept his Snipers from shooting at my Juno or it's Immortals in Turns 4 and 5. It was a "no risk" collection for them.
<<< >>>
Please, please, please, let me know what you think and pass on any other refinements you believe are relevant! If I missed something or got something wrong, I'm all ears. I know a lot of folks out there have tons of trouble fighting the more mobile armies, so if you have some arcane knowledge gleaned from the implacable wisdom of the Sphere, pass it on!
Credit where due...
Leviathan campaign organizer at EndGame in Oakland, CA is Stephen Bajza
Leviathan model scratch built by Chris Loomis
Additional photos by Mike Montesa and Stephen Bajza

The rural boards throw everyone through a loop as most the conventional wisdom on this game comes strictly from urban boards. Did you not have the Menchits in game 2?
ReplyDeletechrisloomis13
I did, but they got shot out of the sky on turn 2 (3?). I had to activate something else first, if I remember correctly, and Solomon saw his chance. I was unlucky in the crash, as well. I'm replacing them with 2 more Helios, BTW. Need to be able to kill more aircraft, I think.
Delete