
by Rich K
My last few games I've used a Nurgle Lord on a Palanquin with good effect so I've spent the last couple of weeks slapping one together... and they've been a busy few weeks!
Aside from the Palanquin, I have him kitted out with a Burning Brand, a Sigil, a power weapon (usually a maul), and sometimes other items. Turns out, the palanquin/lord combo is pretty awesome! The palanquin adds a wound and two attacks! Makes him "bulky," though.
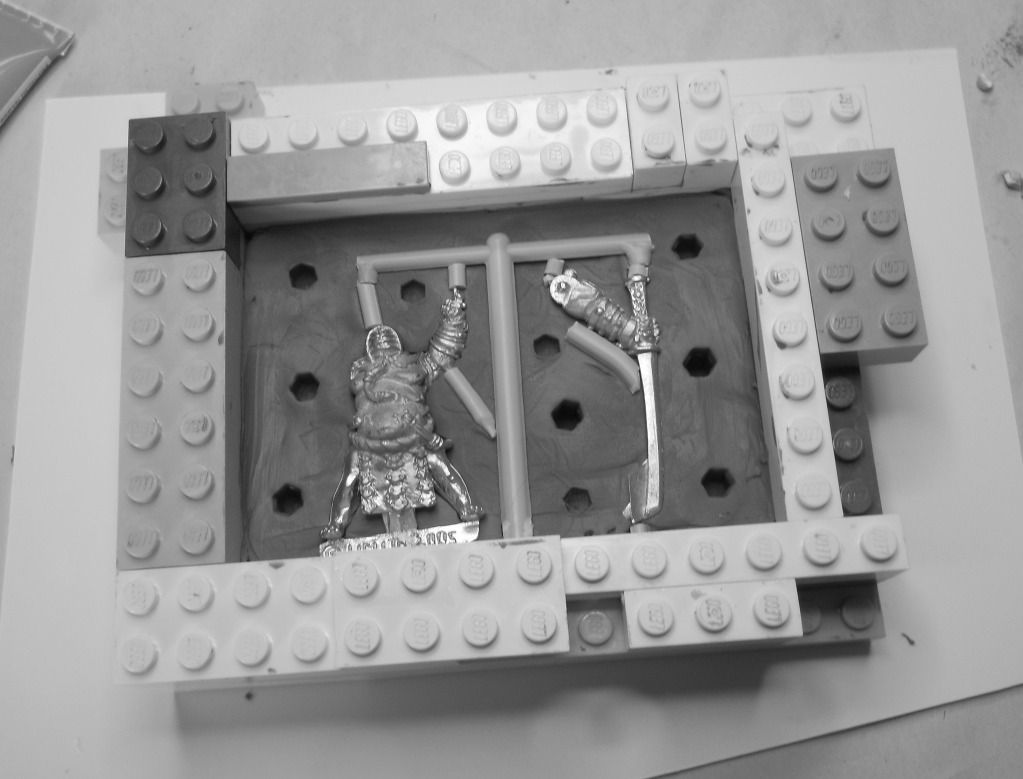
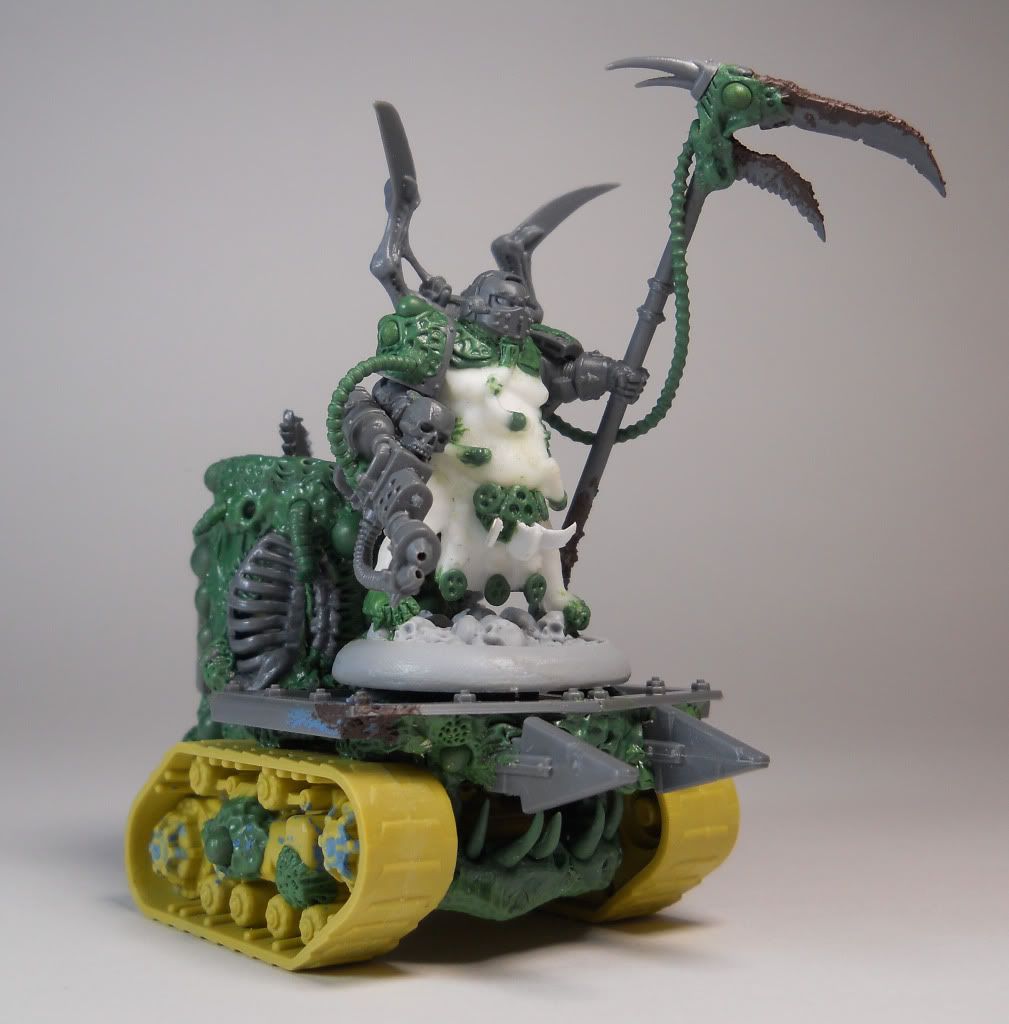
For some reason the idea of a sumo-wrestler lord struck me so I searched high and low for a 28mm model of a sumo wrestler. I finally found something useful at FRP Games for under $10.00! It's from a company called Urban Mammoth. I'm not sure if it's from a specific game but it's exactly what I was looking for... except I didn't realise it was metal until after it arrived. I hate working with metal so I cast up a crappy copy and worked from that.
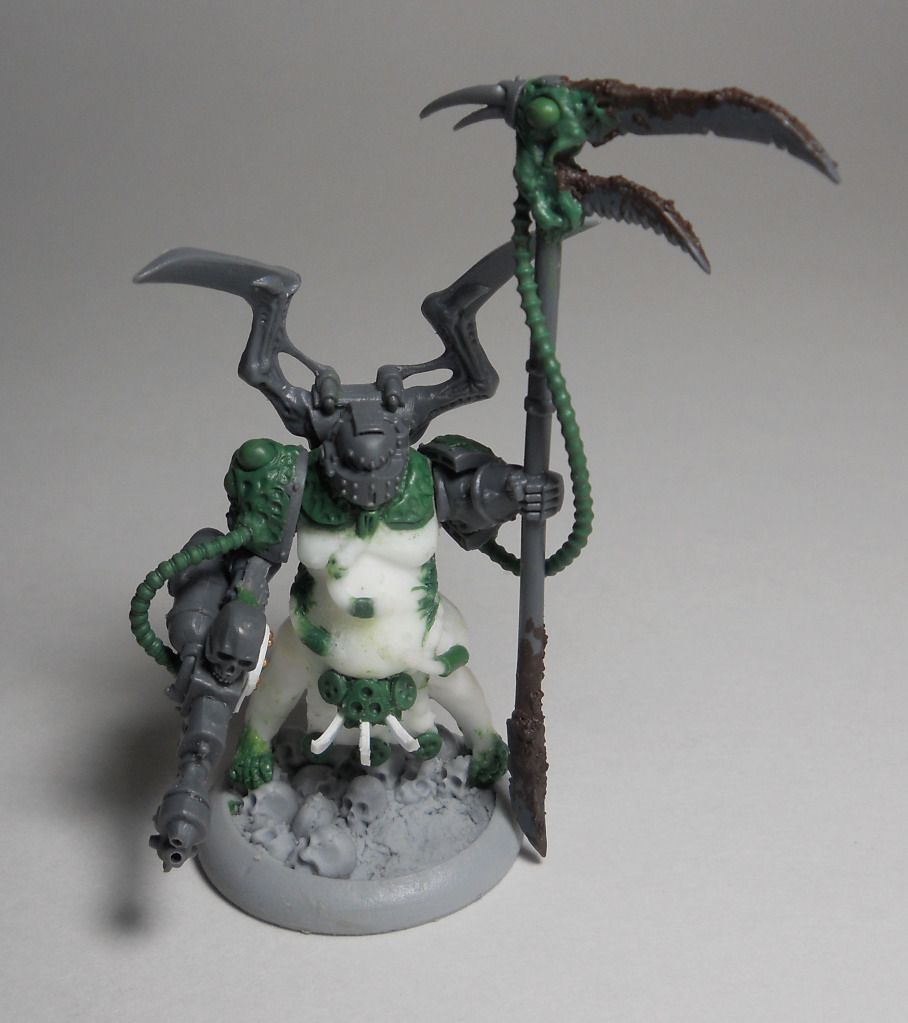
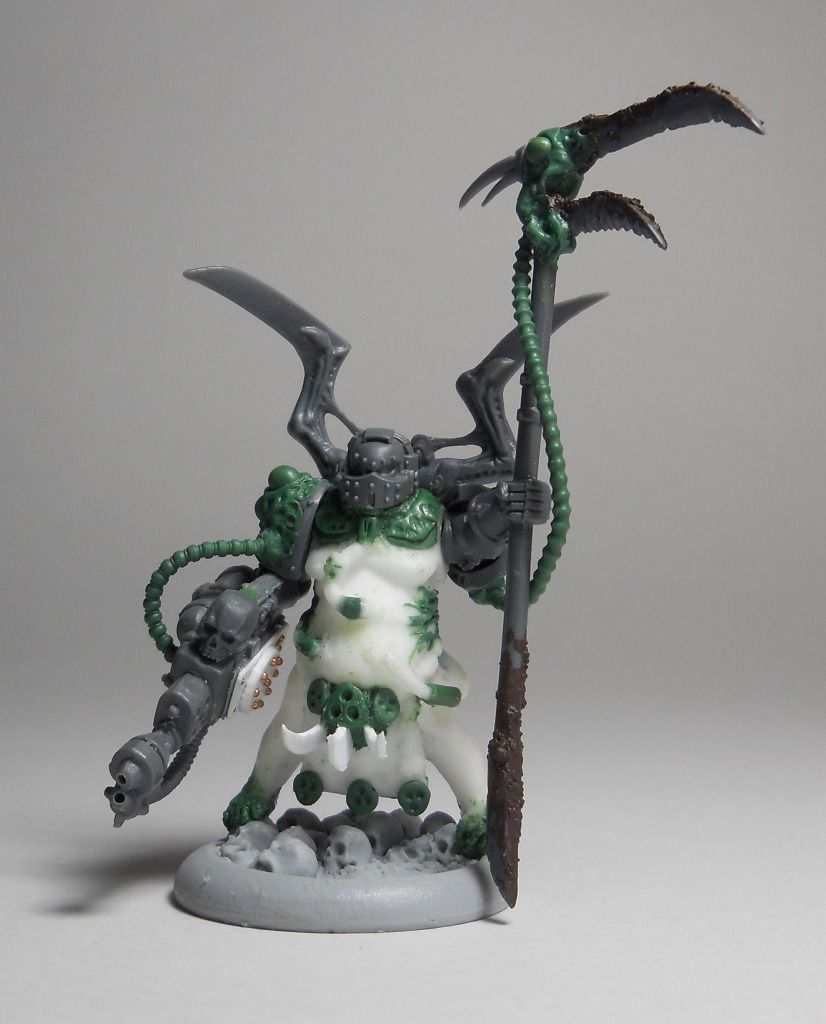
I built him a power scythe so as not to tread on any WYSIWYG... after all, there are no rules for a scythe so I figure it can act like a sword, a maul, an axe, or whatever. The GS hoses were done with a Tentacle Maker, of course.
The Burning Brand is just half of a combi-flamer from a Rhino kit with some Nurgled green stuff and hoses.

The Scythe (and the lower blades) are from a WHFB Zombies kit. The backpack is from a 40k Possessed CSM kit and the helmet is from a SM Venerable Dreadnought.
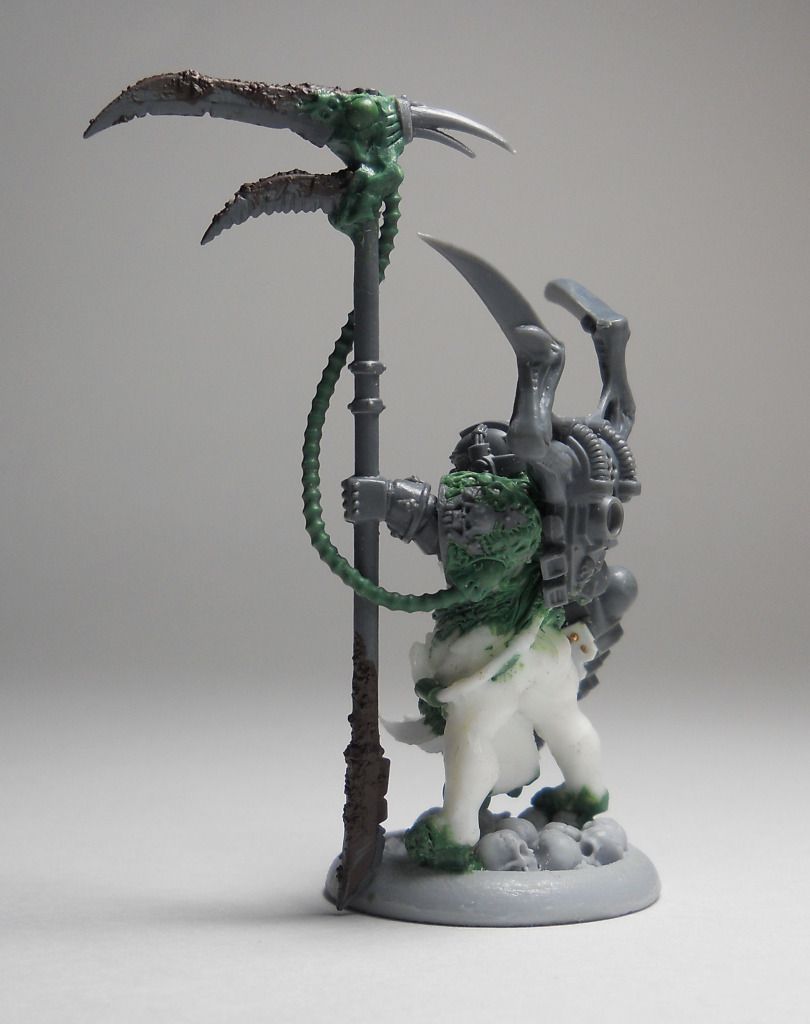
The Green Stuff work on the feet and the belly hoses are bubbles I had to fill in due to my poor casting technique. I think I did alright on making it look like his feet are rotting off. The GS around the sides of the torso is supposed to look like inflamed veins once they are painted. I want him to look less zombie, i.e. no guts falling out, and more seriously sick. He'll likely be pale with a gangrenous skin tone and bruising.

Oh, and he's fully magnetized!... he even sticks to the palanquin, which keeps me from dropping him all over the table during games.
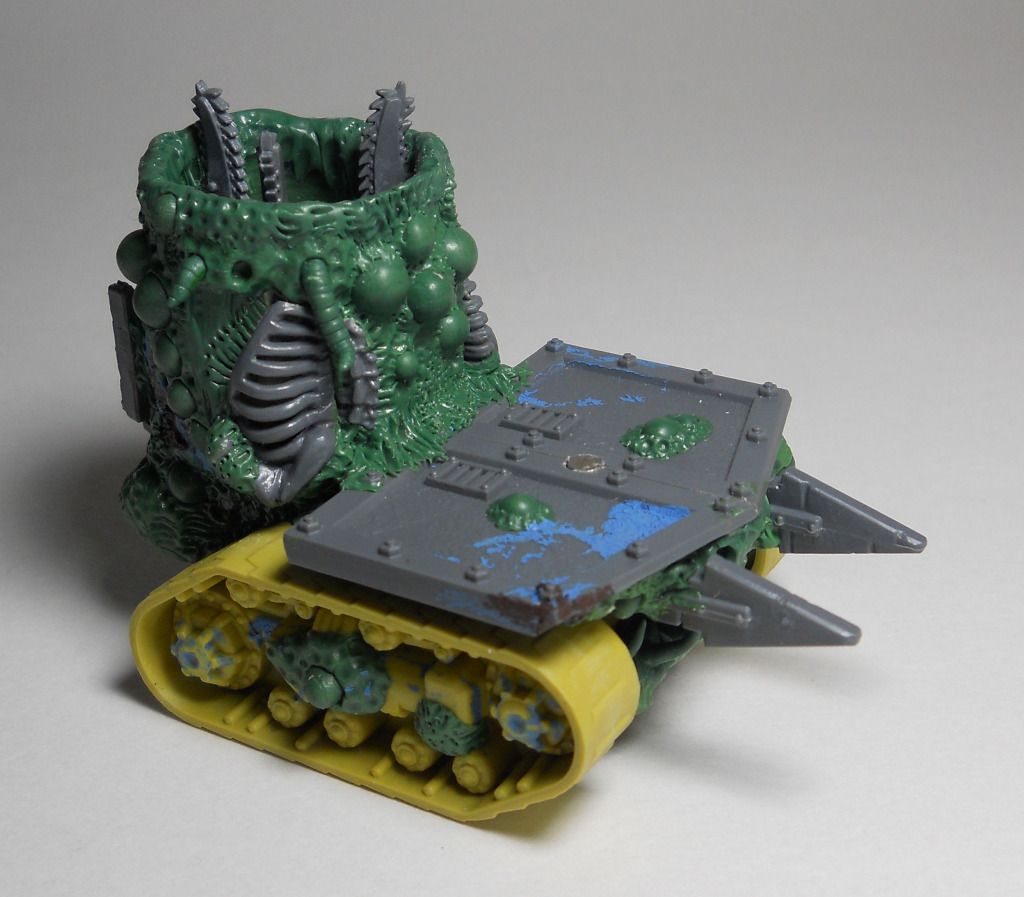
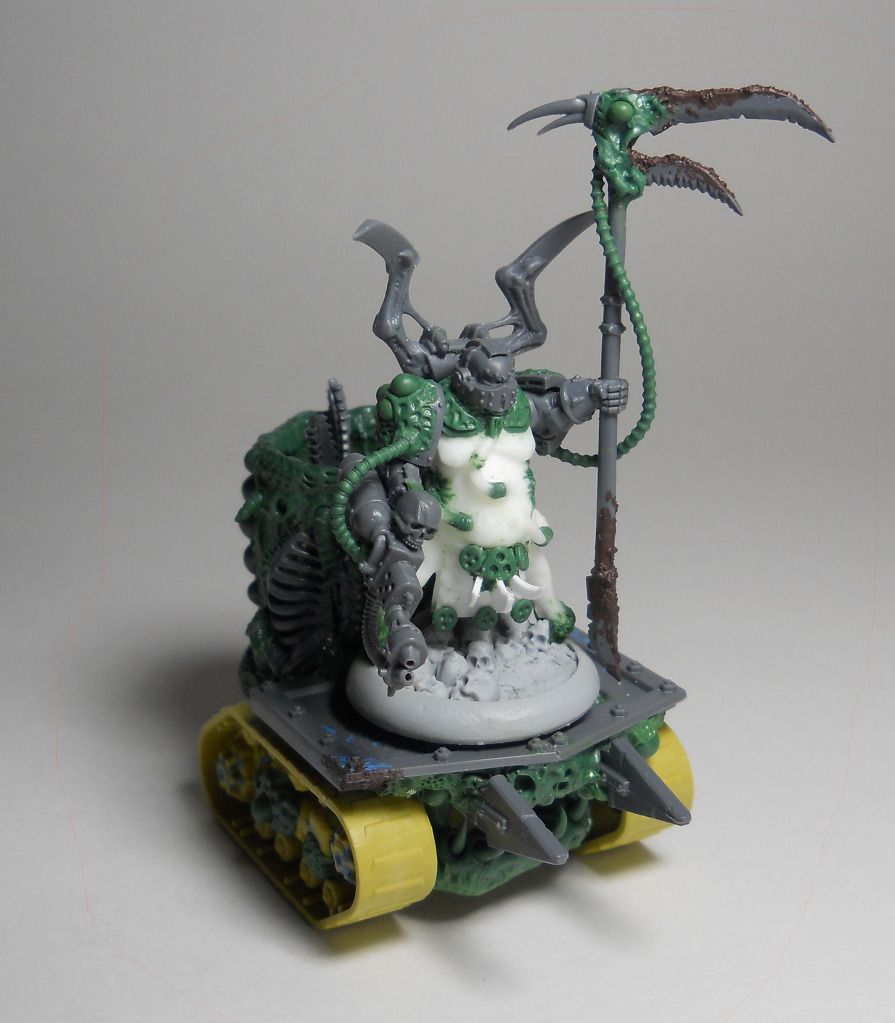
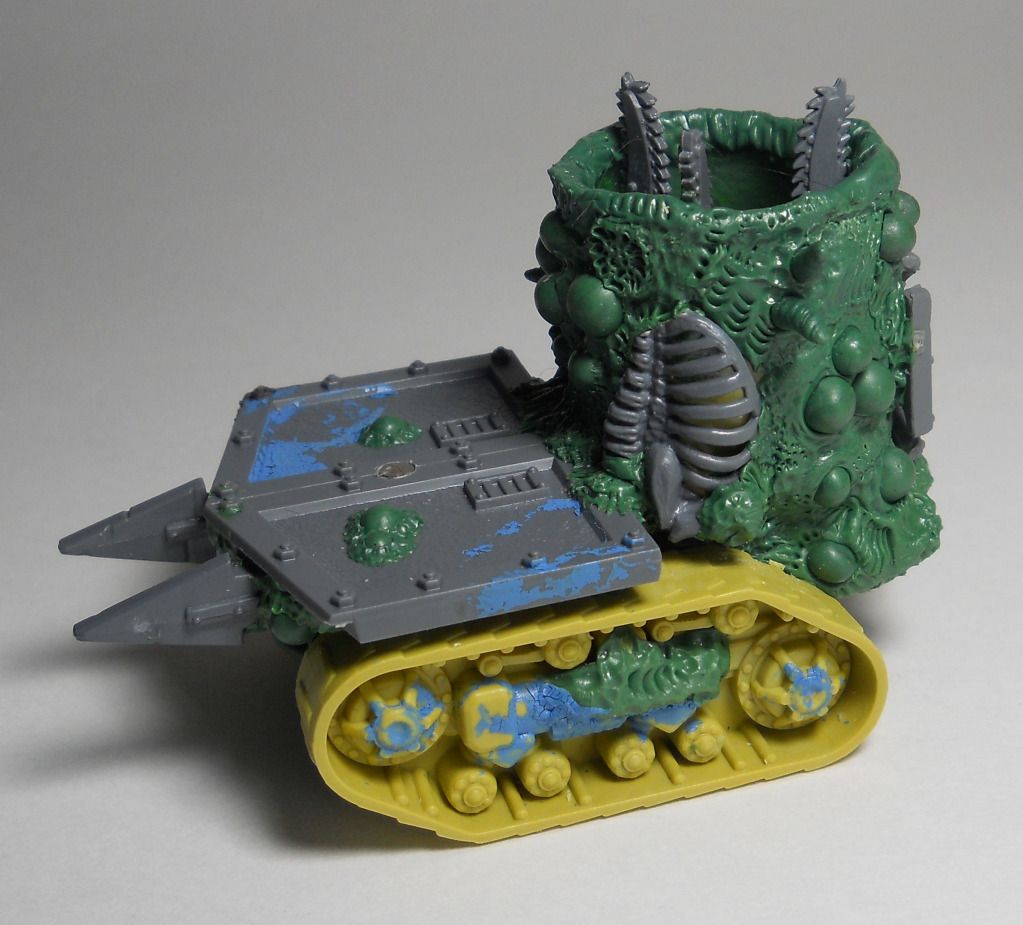
In truth, I've been working on the palanquin for about a month as sort of a background project. Mostly just practicing my sculpting. The blue paint is crackle paint that has since flaked off. I'll probably re-apply just before I undercoat it.
The ribs are from WHFB Skeleton Chariot horses.
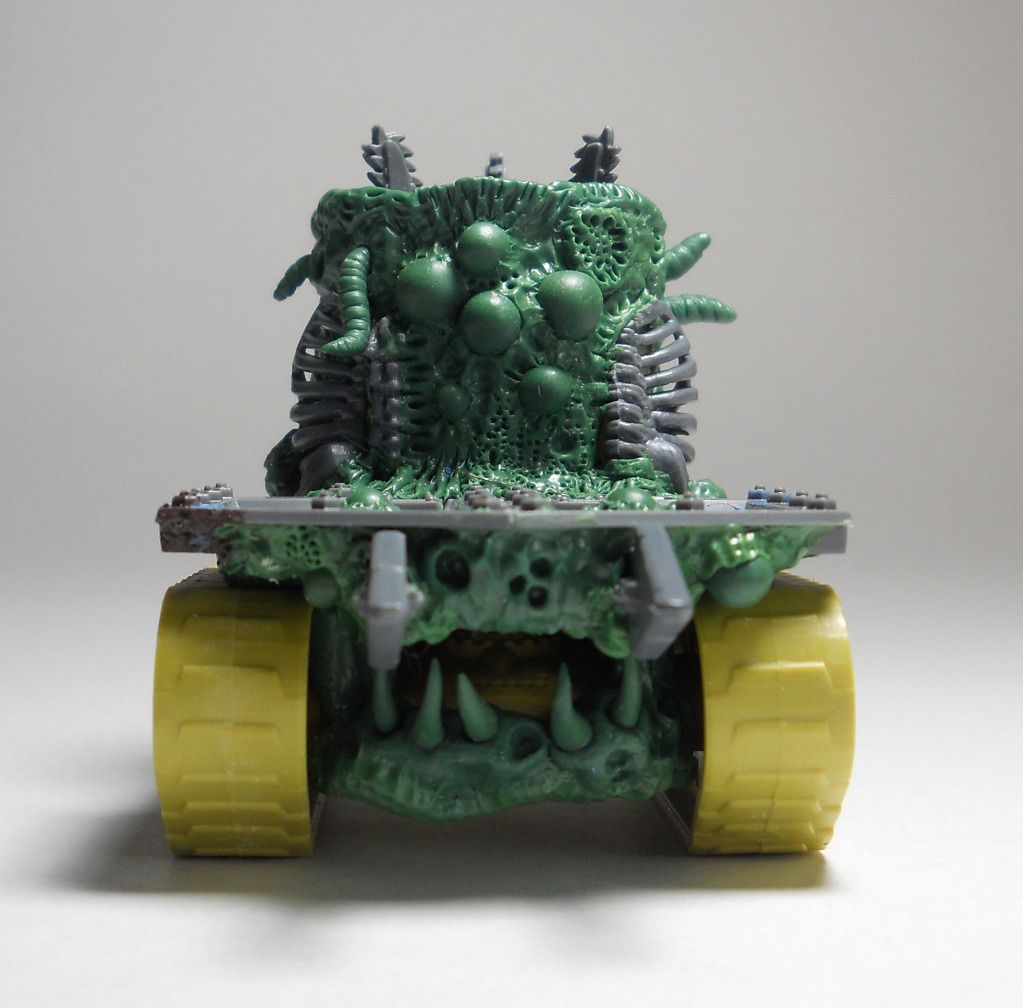
The mouth was an experiment to see if I could sculpt some teeth. Basically, I rolled out some smooth curved GS cones and let those cure. Then I sculpted the gum area and made sockets for those teeth. All I had to do then was super glue the teeth in place once everything hardened. The spheres above each tread will be painted to look like googly eyes.
This palanquin is a quasi-daemon engine that runs off the fallen foes of the Lord. It's not a new idea, but it's a sufficiently gruesome one. Lose a battle against this Lord and you end up blended.
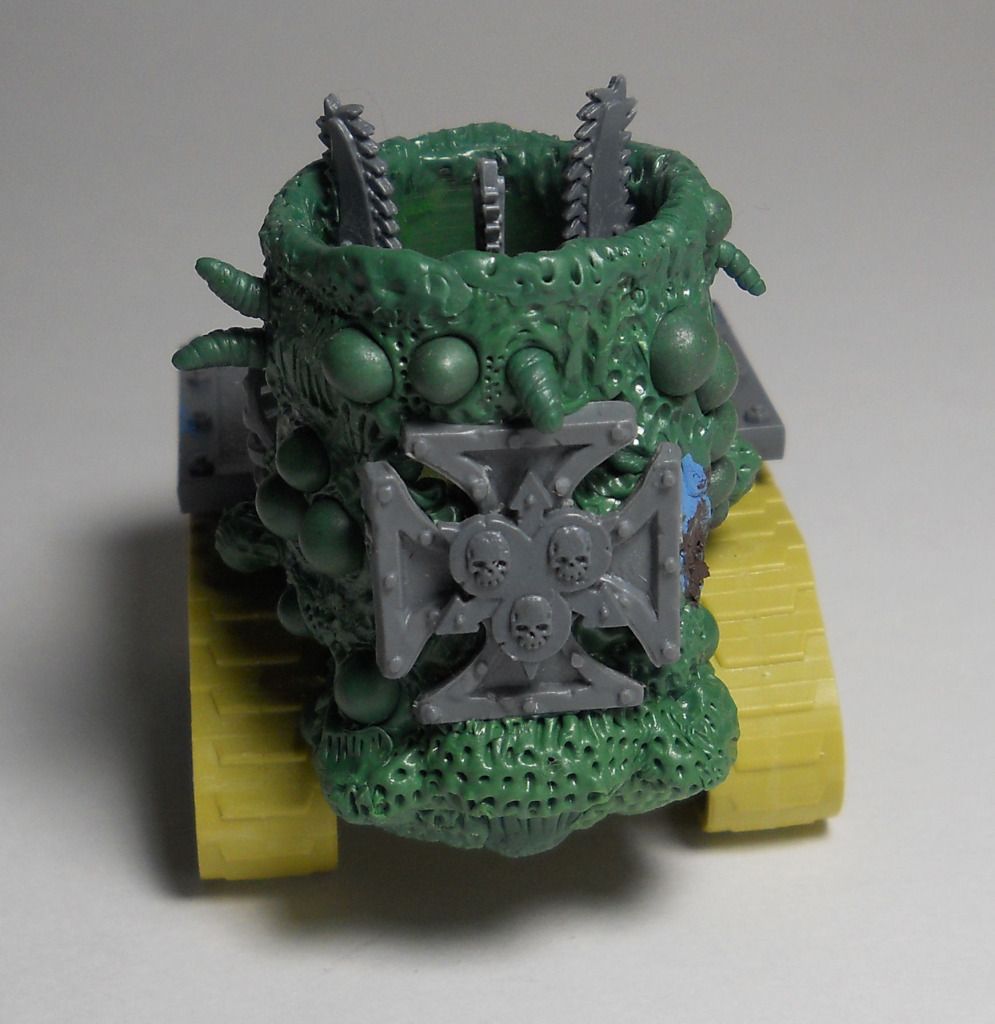
The giant maggots are easy to make, too. Just make short blunt cylendars and roll them up in a Tentacle Maker. Let them cure in bendy shapes and then cut them in half and glue them into the sockets, just like with the teeth.
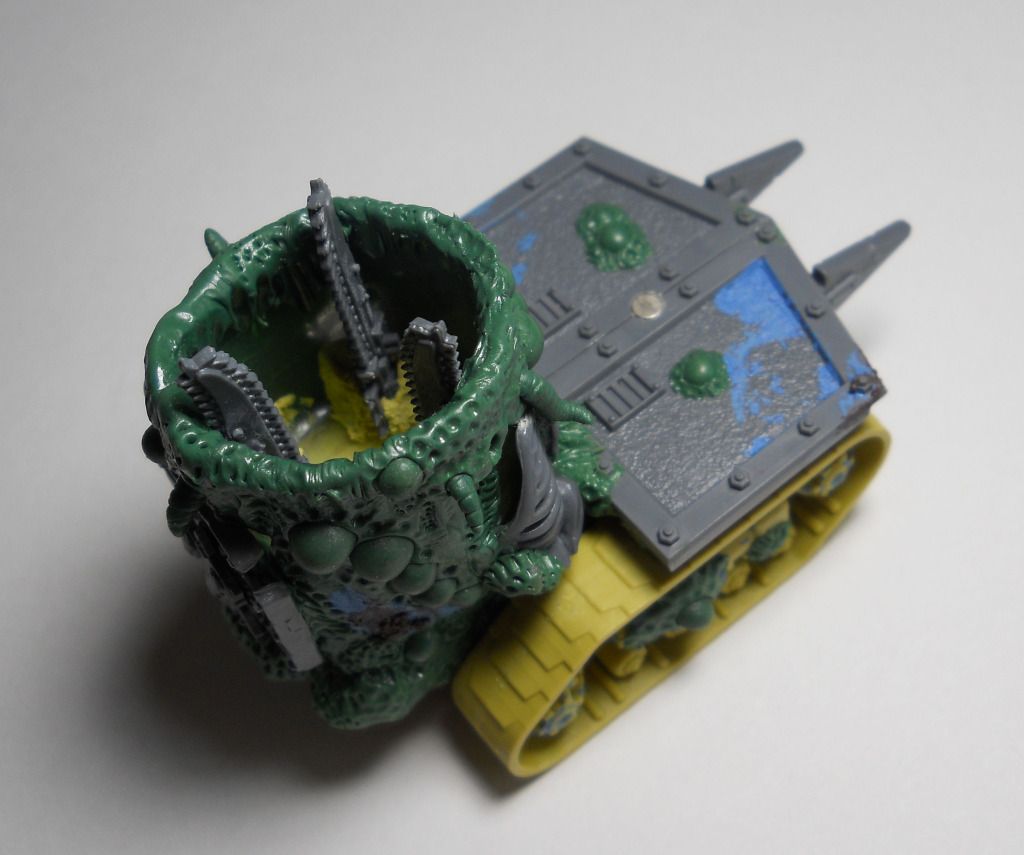
I'm not sure if anyone has done a Nurgle blender before, but that's what the chainswords inside the bucket on the back are for. I'll likely borrow some water effects from the guys at Frontline and have a pre-painted Space Marine getting chewed up. I'll probably do that as one of the last steps as I don't want to mess up the water effects with paint.
Some of the other bits I used were:
- The sides from a quad-gun base for the deck.
- Extra dozer spikes I had laying around for the arrow-like things poking out the front.
- A Robogear tracked drive for the... er, drive.
- A very used paint storage container for the blending chamber.
I know the white (cast) parts of this model are hard to see. Hopefully, they will look better with some paint, which should help bring out the detail. Now I just need to come up with a name for the army. I want to do something vulture themed... are there any carrion bird themed Chaos Legions?

SO awesome! Just one question: I've seen you've used a "feeder" for your mold. Did you get many bubbles using that system? I'm sorry to ask it, but I can't see from the photos, the resin is too bright. I normally fill both halves of the mold and them put them together when the resin is starting to get hard because I'm afraid I won't get good casting quality using the method you've taken.
ReplyDeleteThanks, Gafa! Yeah, I can't avoid bubbles for some reason. I just fill them in with GS afterward or cut them off and sculpt something else instead (like I did with the head). The toes for the feet, large sections of the belly hoses, and some of the head got all bubbled out. I think I'll put some GW shade color on the cast parts... maybe that will help me see the sculpting/casting flaws more easily?
DeleteSure, that sounds like a good idea. I recommend you then this technique, I do it and don't get any bubbles at all: you have to fill with resin both halves of the rubber mold, and then start bursting the inside bubbles real quick with a toothpick before the resin starts curing. When it's not translucent any more you should stop, as it's getting harder and if you keep moving the toothpick it'll become a mess, I tell you. Then you join both halves and let the resin totally cure. That's pretty much it.
DeleteI'll try that on my next cast. Thanks! You have to work quick, I suppose.
DeleteGive it a shot, I think it'll go much better. The amount of time you have depends on the type of resin you're using. If it's a regular poliuretane resin you have nearly no time, about 1 minute to burst the bubbles, if it's SmoothCastt 300 (I use that one and it's white like yours) then you have 3. The time to harden completely is 5 minutes for rthe first one and at least 10 for SmoothCast 300. Good luck!
DeleteI cannot wait to see this all painted up!! Love the sculpt! Great looking conversion!
ReplyDeleteThannks, DizMo! Yeah, I have about a dozen other projects I should be doing instead but this guy hops to the front of my line.
DeleteThese posts are definitely why I'm subscribed to your blog. This walk through is a fantastic, and gave me some new ideas.
ReplyDeleteThanks to you too, Varangian! If I can furnish folks with ideas and good products I'm a happy man. I haven't been too frequent with the posts lately, sorry.
DeleteI always welcome guest posters, BTW!
My life will be meaningless until I see this thing painted. Fantastic work.
ReplyDeleteYou humble me, sir! Thanks, Maxi! Is there an English translation for your blog? I love your work from the photos but translating everything is sorta a pain.
DeleteSorry, only spanish version for now... This is why I include pictures!
DeleteLove the conversion!! The blender on the back got me thinking, would be awesome if you added some form of lifting arm or tentacle to pick up corpses to drop into the blender, kinda as a power source like the car in back to the future!!!!
ReplyDeleteThanks, Ellis! That's not a bad idea. My original vision was that the Lord just sorta flips the defeated over his shoulder as sort of a finishing move.
Delete