

by Novus
So, in my ongoing effort to complete, once and for all, the models in my army, I've finally gotten around to attempting the Nurgle Soup in my Warlords counts-as Palanquin/Bike (above). I've been putting it off, mostly out of fear of messing it up.
What I wanted, looks-wise, was a semi-transparent broth with some scary entrails and body parts inside. As if the possessed machine was fueled by the opponents the Lord vanquished. To that end there was to be three layers of Soup:
- Bottom layer consists of various body parts and recycled GS all monochrome dry brush green.
- Middle layer consists of a thin layer of clear resin, so you can see down to the bottom layer reliably.
- Top layer consists of green tinted resin with sickly grey dry brush body parts sunk in it.
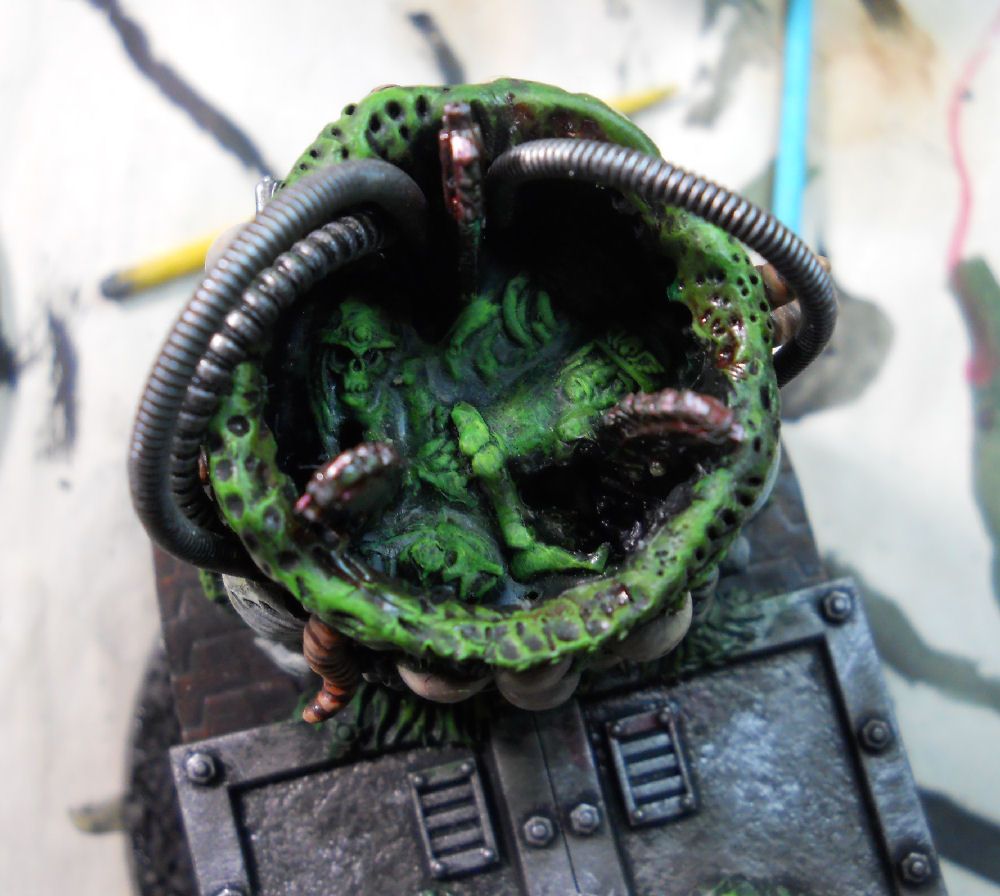
What you see above is the first layer. I embedded some appropriate looking bits and GS waste in PVA glue at the bottom of the tank. This worked out OK once it was all done but it took forever for the PVA to dry. I waited 4 days without touching it too much and it still wasn't dry. I then got frustrated, jammed the tube from some canned air down under the dried surface layer, and blew out the excess glue. It was messy, but I think it added to the overall effect of the first layer.
I then dry brushed the color shades from black on up through dark olive to snot green. At this point, I'm pretty happy with the first layer.
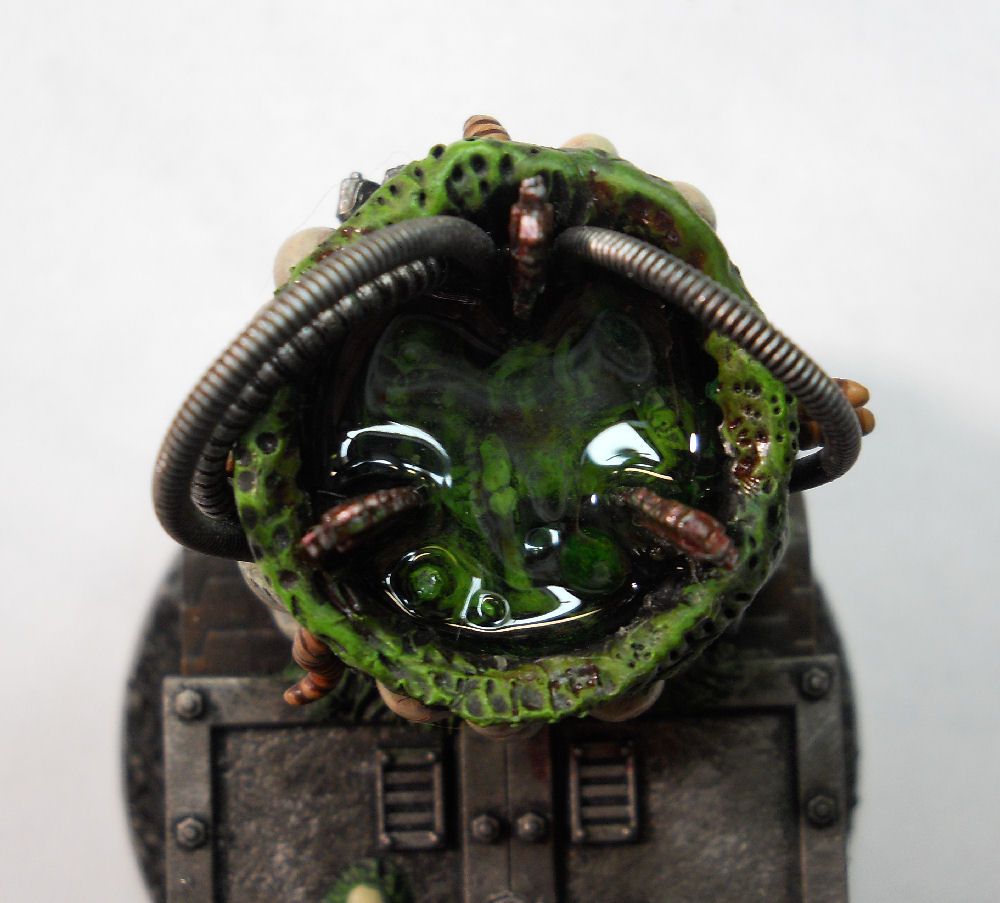
For the middle layer I added some Tentacle Maker hoses and just poured some clear resin into the tank so it just about covered the majority of the gore of the bottom layer.

After choosing some nice bits from the WHFB Zombie kit I have laying around, I primed them black and dry brushed them in shades of grey. Then I gave them a very light wash of green. I wanted them to have the color of an over-boiled sausage with green slime on top.
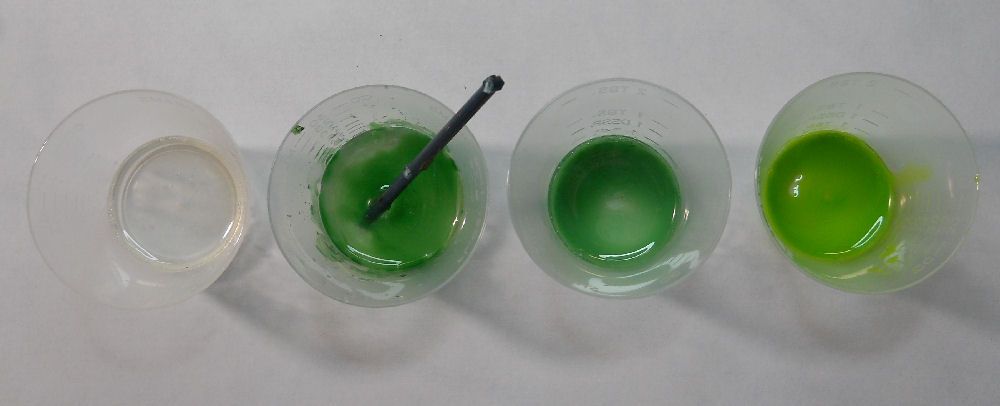
Next, I started experimenting with how I would do the top layer of tinted resin. I poured a little clear resin as a control (left to right) and 3 different versions of what I thought would work: resin with green wash on top, resin with green wash thoroughly mixed in, and resin with snot green acrylic thoroughly mixed in.
I could see pretty quickly that none of these was going to give me the look I wanted so I mixed the last two haphazardly together with the clear resin and promptly scuttled away to buy some tinting liquid from my local craft store, if they had any. Which they did!
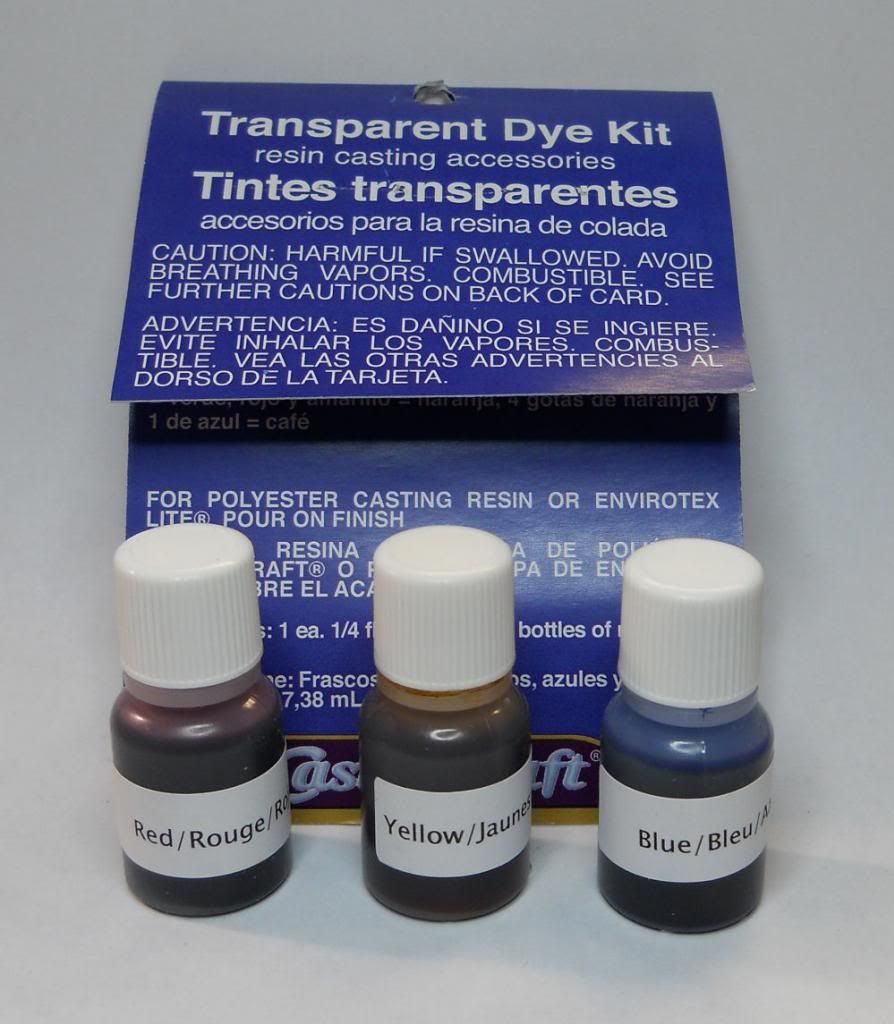
I came home and quickly worked out that 1 drop of blue tint and 2 drops of yellow tint would give me the sickly green color I wanted but it was waaaaay too opaque. I had to mix a bunch of extra resin to reach the thin, near-transparent broth look I wanted. BTW, the tinting liquids stink. I mean they smell bad and I think they got me a bit loopy (read the warnings, like I didn't). So if you plan on tinting any resins, do it in a well ventilated space.
I poured in the tinted resin and positioned the parts where I thought they would look good and left them to cure for at least 24 hours. The resin I used says a soft cure takes 24 hours and a hard cure 72, so I went off and chased something shiny for a day.
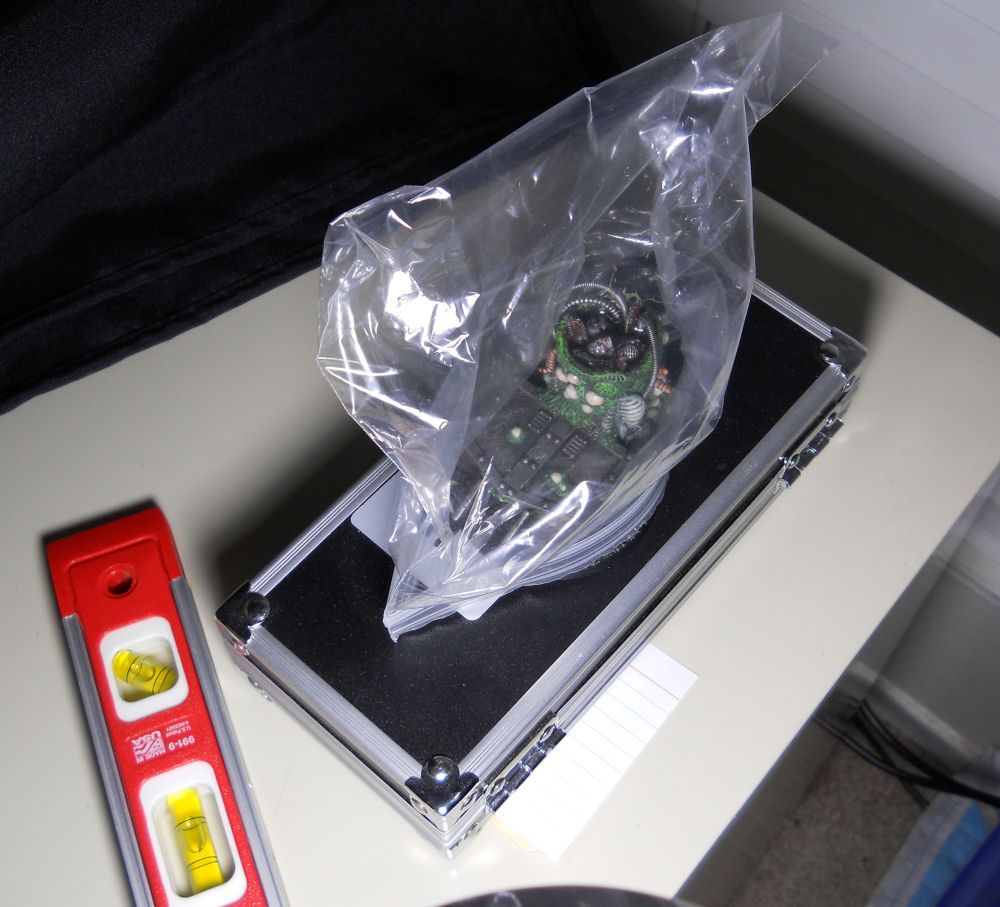
An important thing to remember when you cure resin: if you need a level surface on the resin in the model, like the surface of water in a glass, you should make sure the curing space is level. You don't want the broth, or whatever you are simulating, to look like it's defying gravity. That will just kill any realism you are trying to achieve. You want to convey the physics of the broth/liquid accurately, which means a surface that is perpendicular to the pull of gravity. I leveled my curing space with some Popsicle sticks and covered the model with a baggie to keep my cats hair from floating into it.
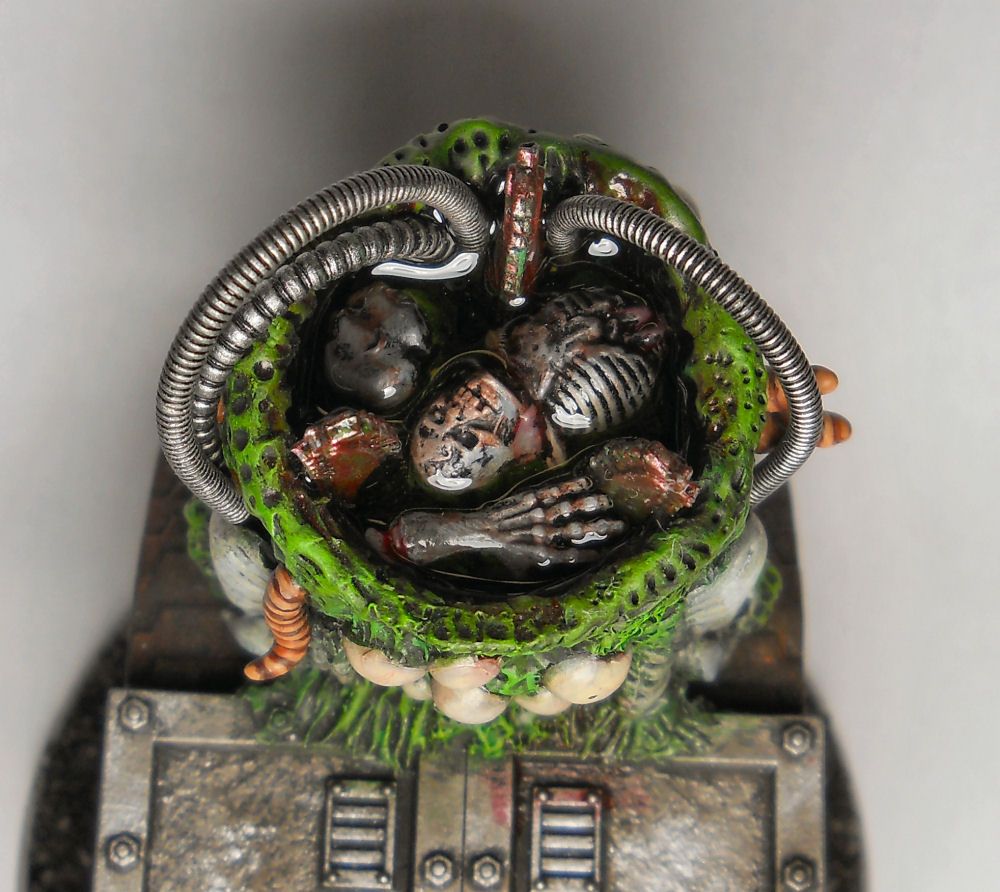
All in all, the result is pretty good but not exactly what I wanted. You really can't see down into the broth because there's just too much stuff (body parts and tinted resin) in the way. You need a flashlight to even see to the first layer. I probably could have just stuck with the first two layers and it would have looked better. Oh, well.
Ironically, a couple of days later I was cleaning up my bench and found the container with the haphazardly mixed resin, wash, and paint and it was almost exactly what I wanted, looks-wise. It was clear and cloudy simultaneously! I could have poured this mixture in, partially submerged the over-boiled body parts, and been done much more quickly. Bummer.


I think I can save the effect if I remove the model from it's base and drill a hole in the bottom for an LED pointing up into the broth to give it a nice glow. Might be fun/cool but I'm working on some Plaguebearers, currently.
Happy Bashing!

No comments:
Post a Comment